BMW Z3 initial cleaning

The Z3 was in rough shape when I got it. There was probably mold growing on the dashboard.

The first thing I did was to take it to a detailer and have it detailed. It cost a couple hundred bucks, but that was totally worth it. They did a good job, especially with how dirty it started.

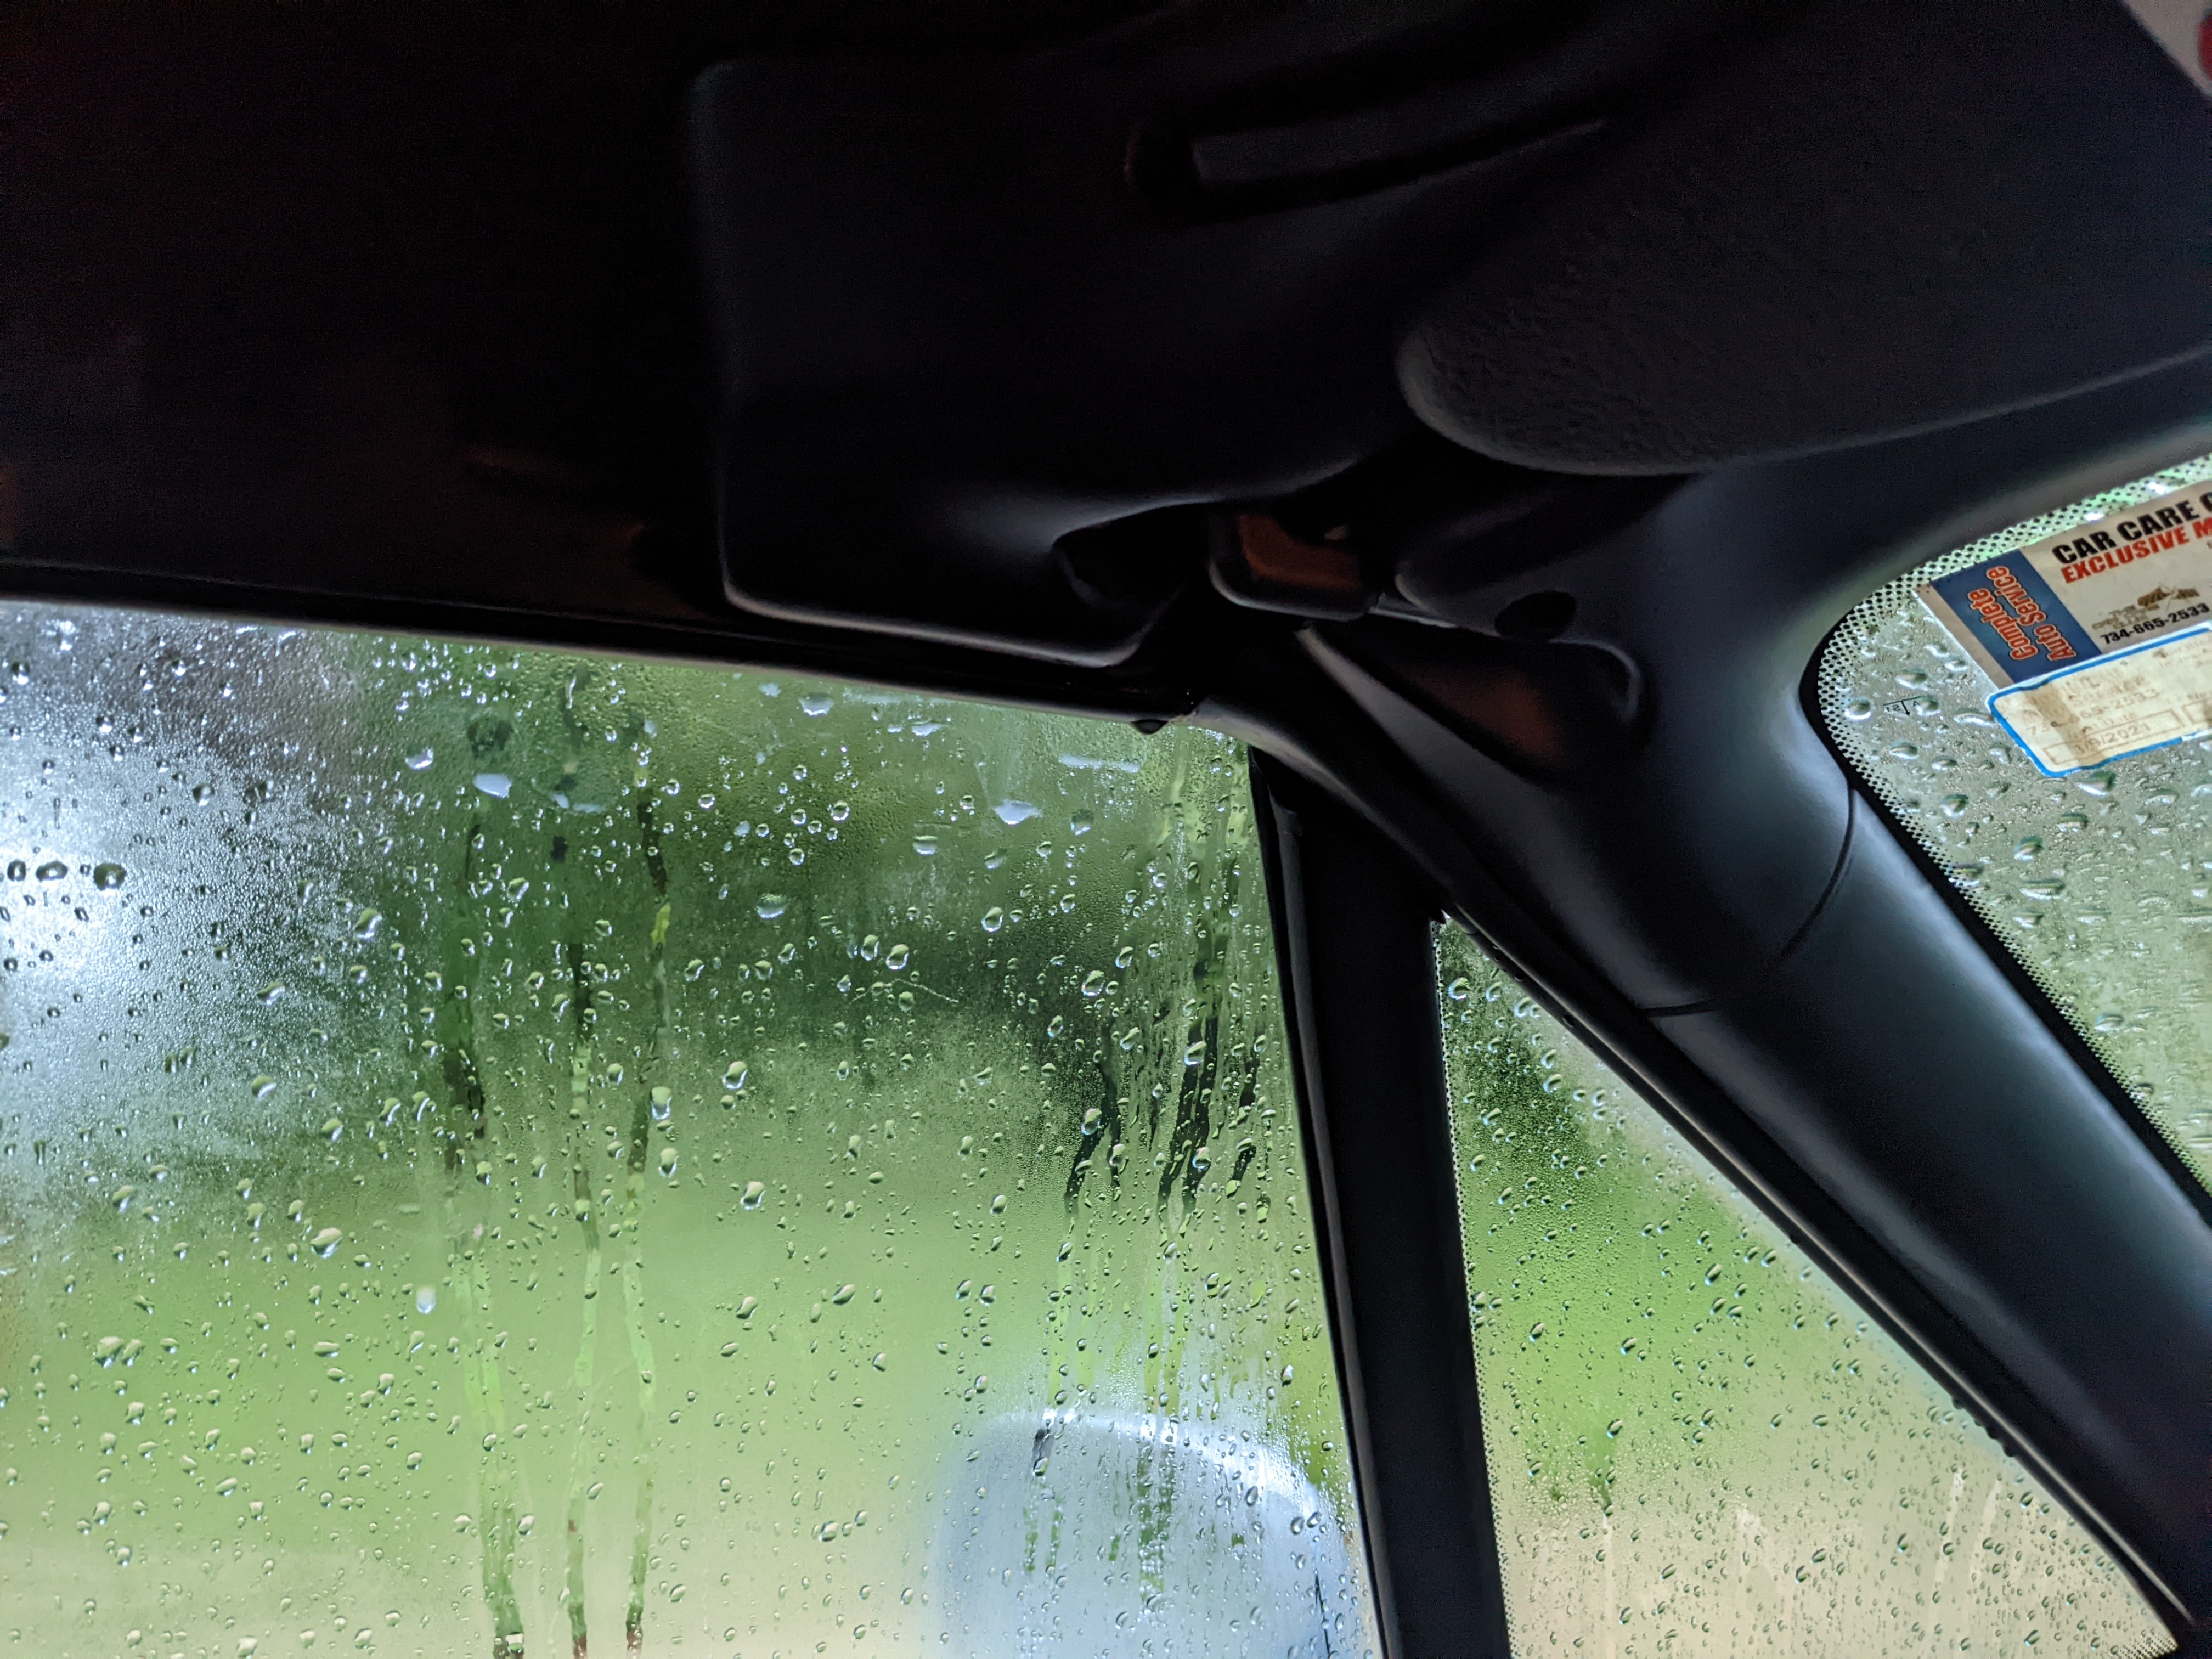
This is when I first realized the roof leaked. Once I saw that, a lot of the rest made sense.

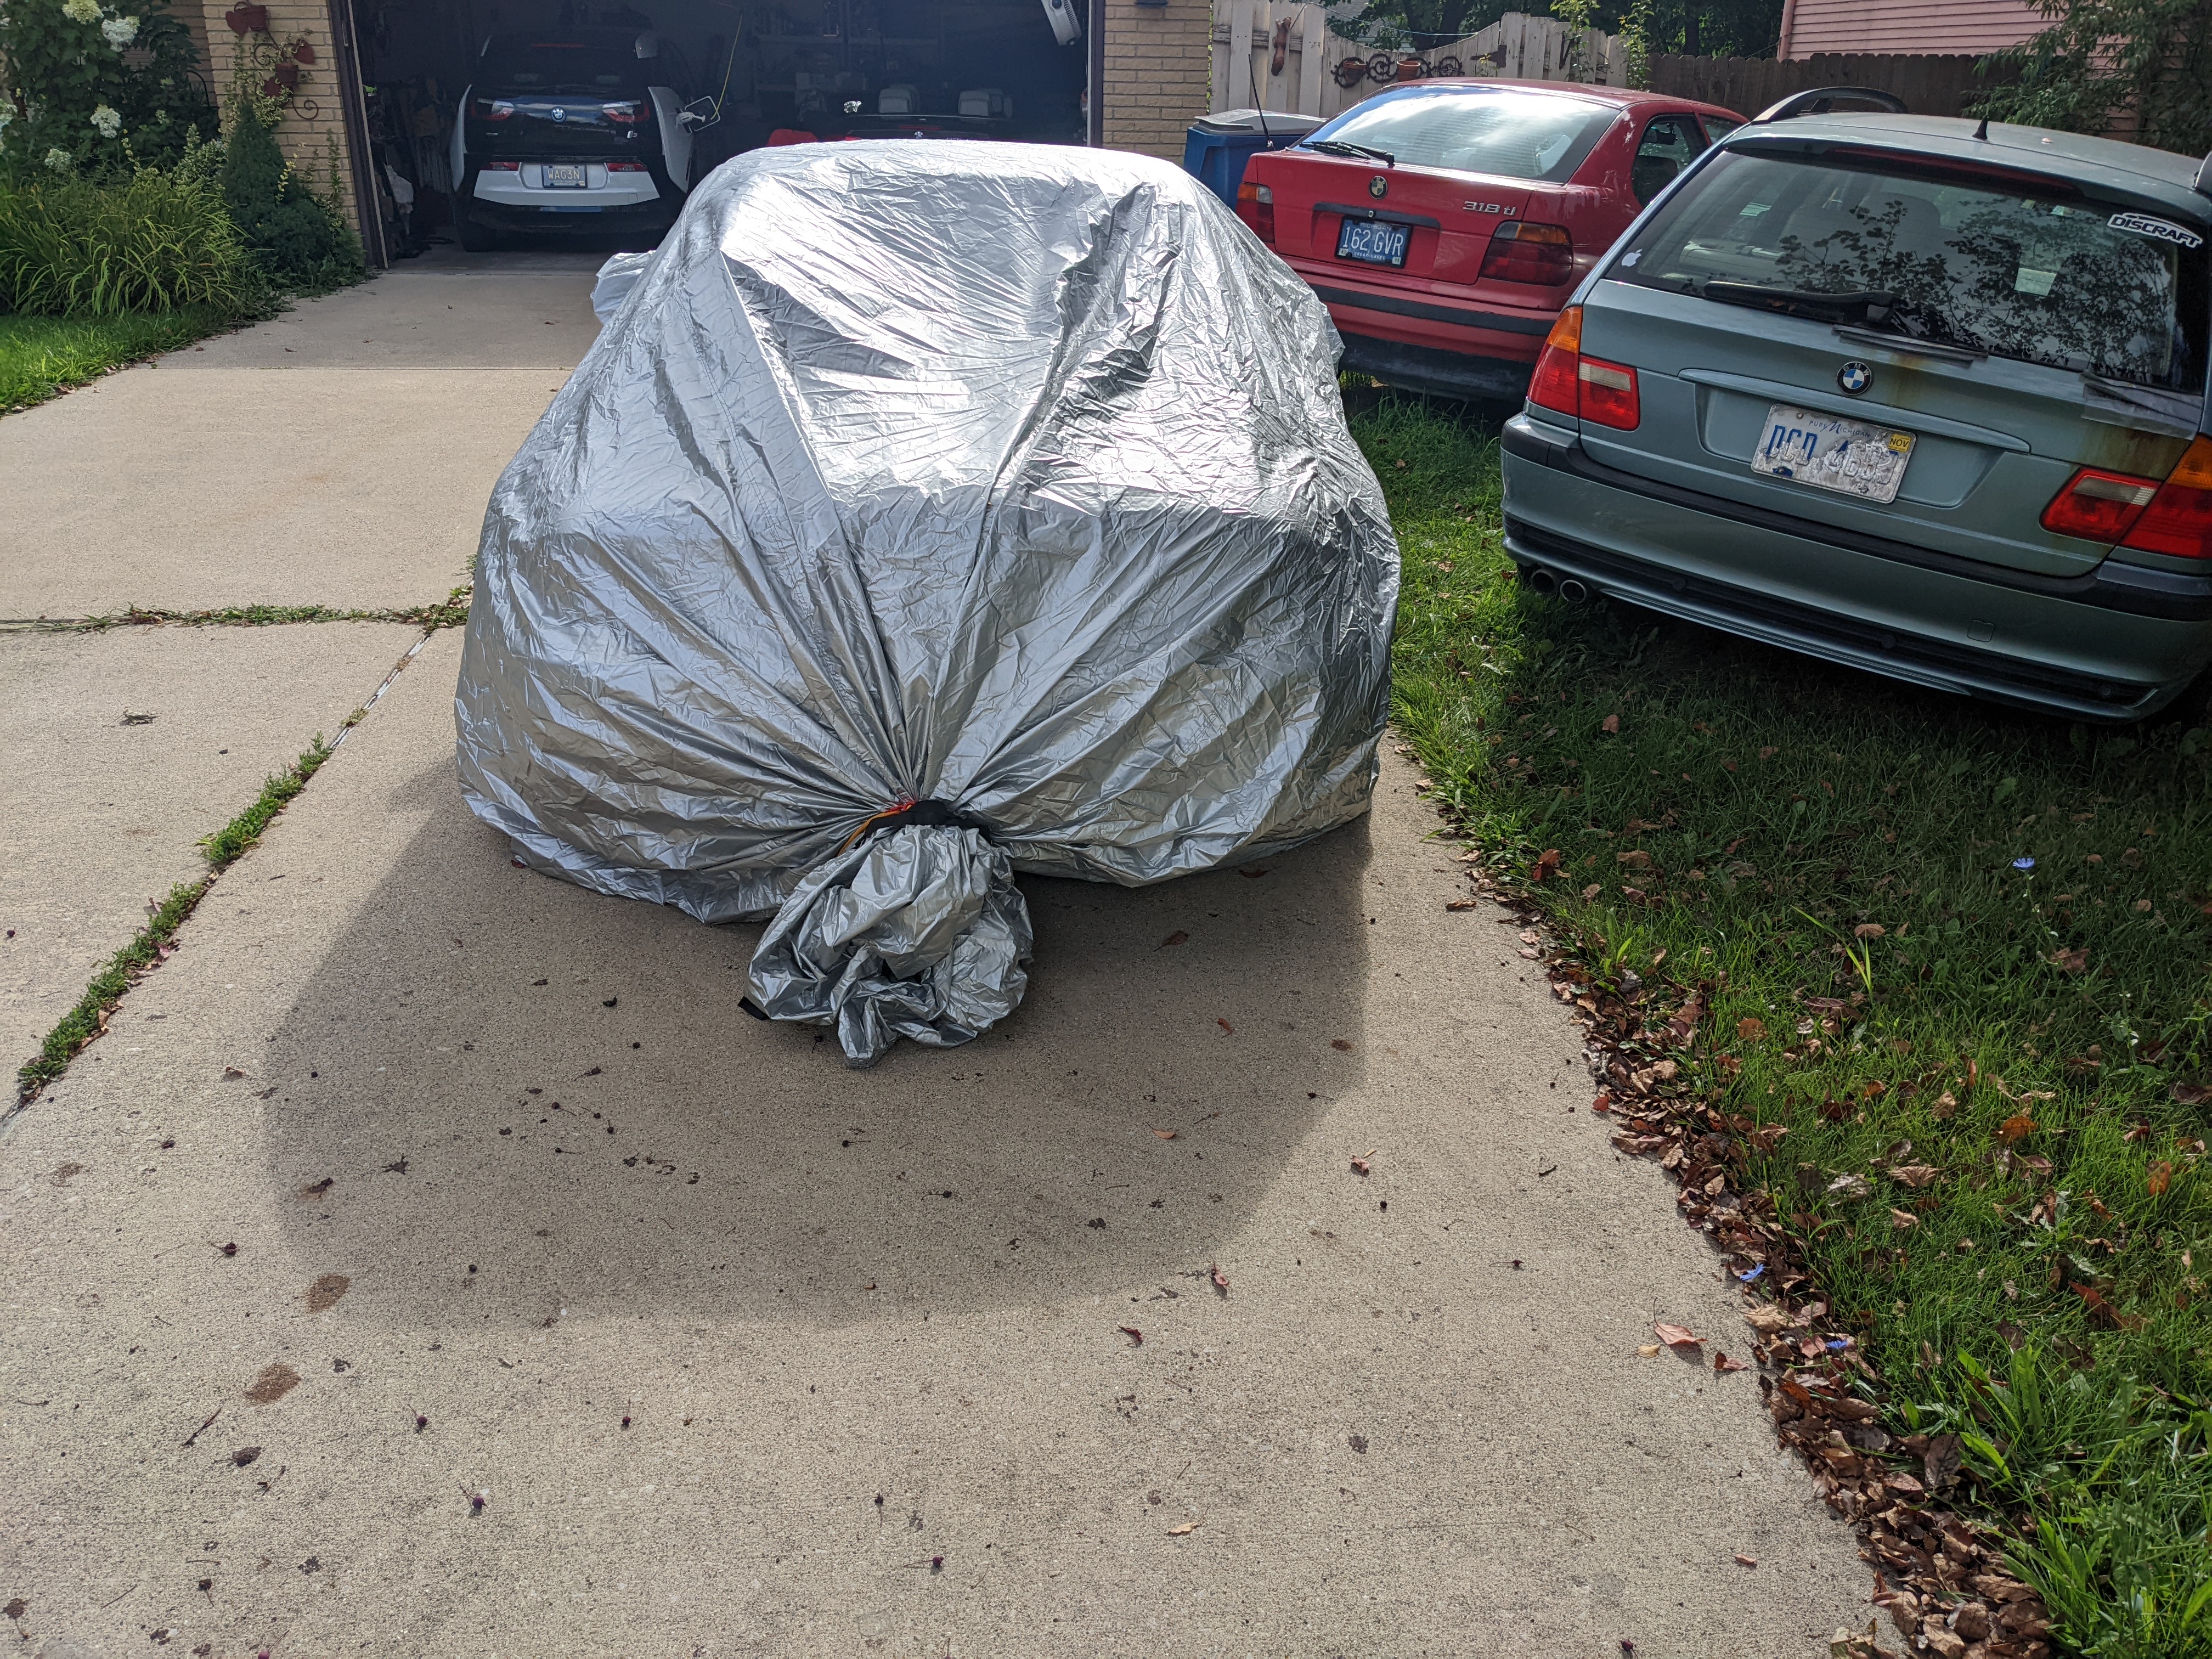
Is this a man bun? 😀 The spare car cover I had was way too big, so I bunched up the extra so the rest was fairly tight around the car. I didn’t have room in the garage and didn’t want the roof leaking any more.

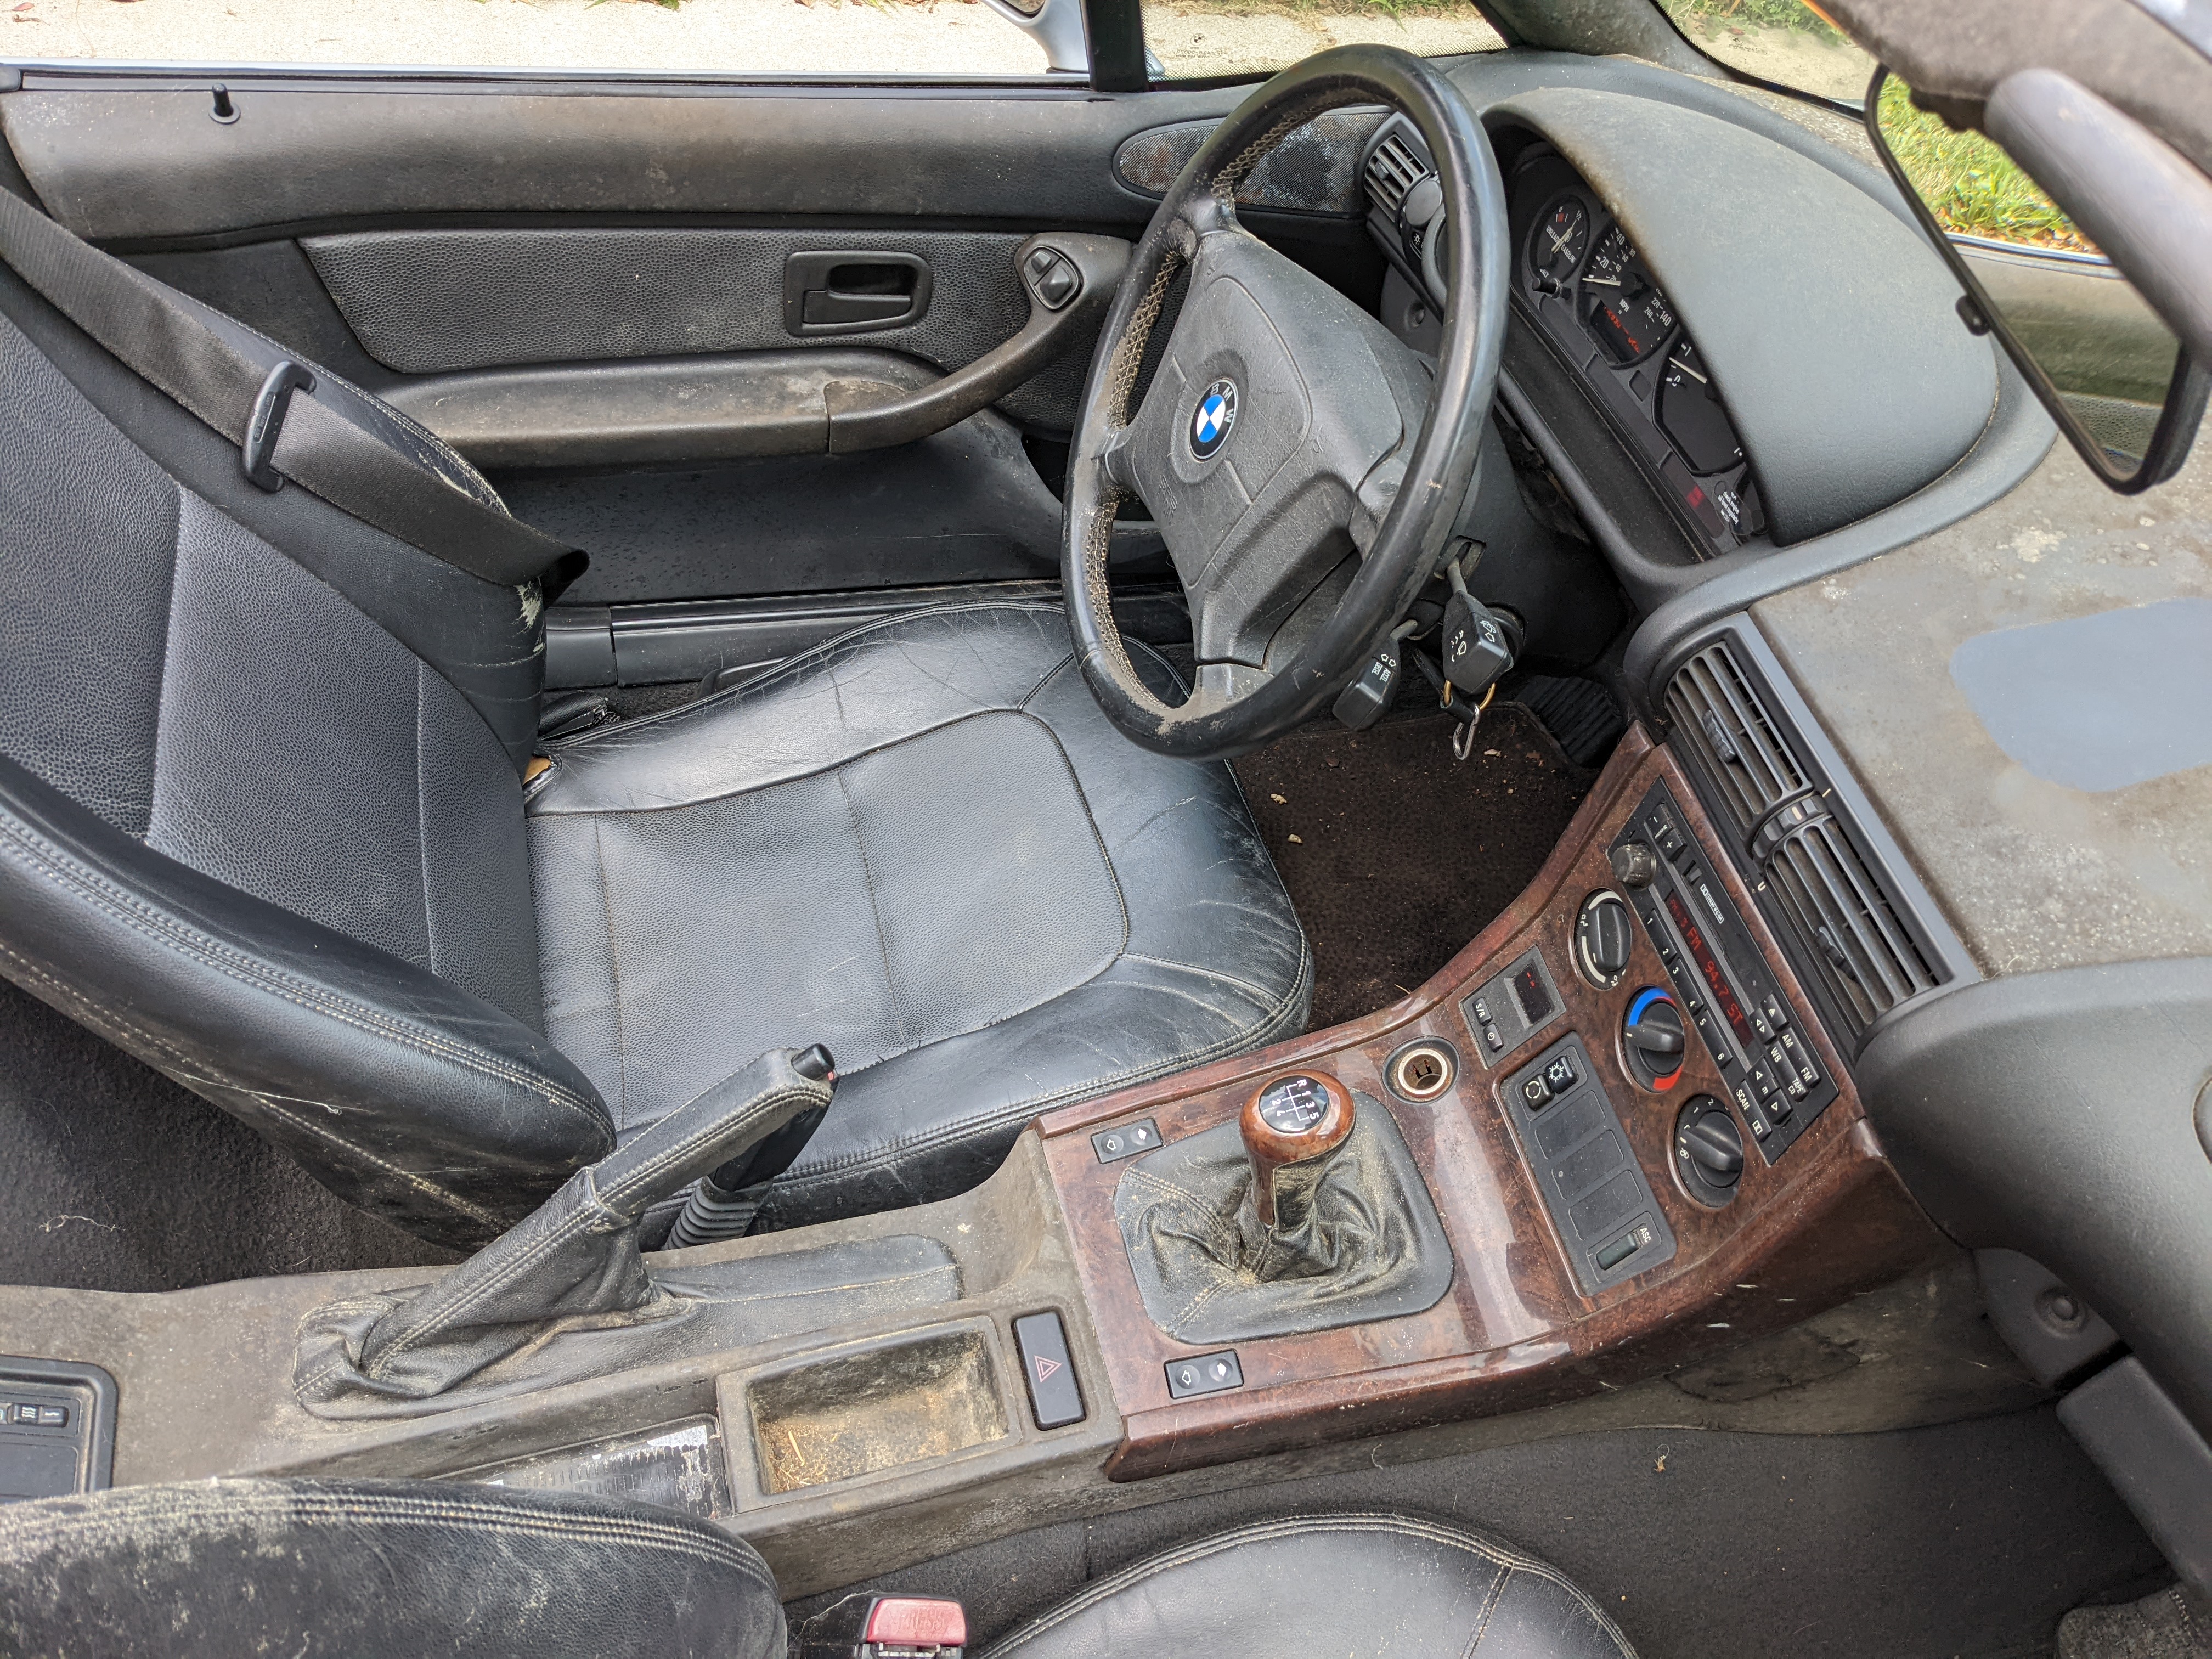
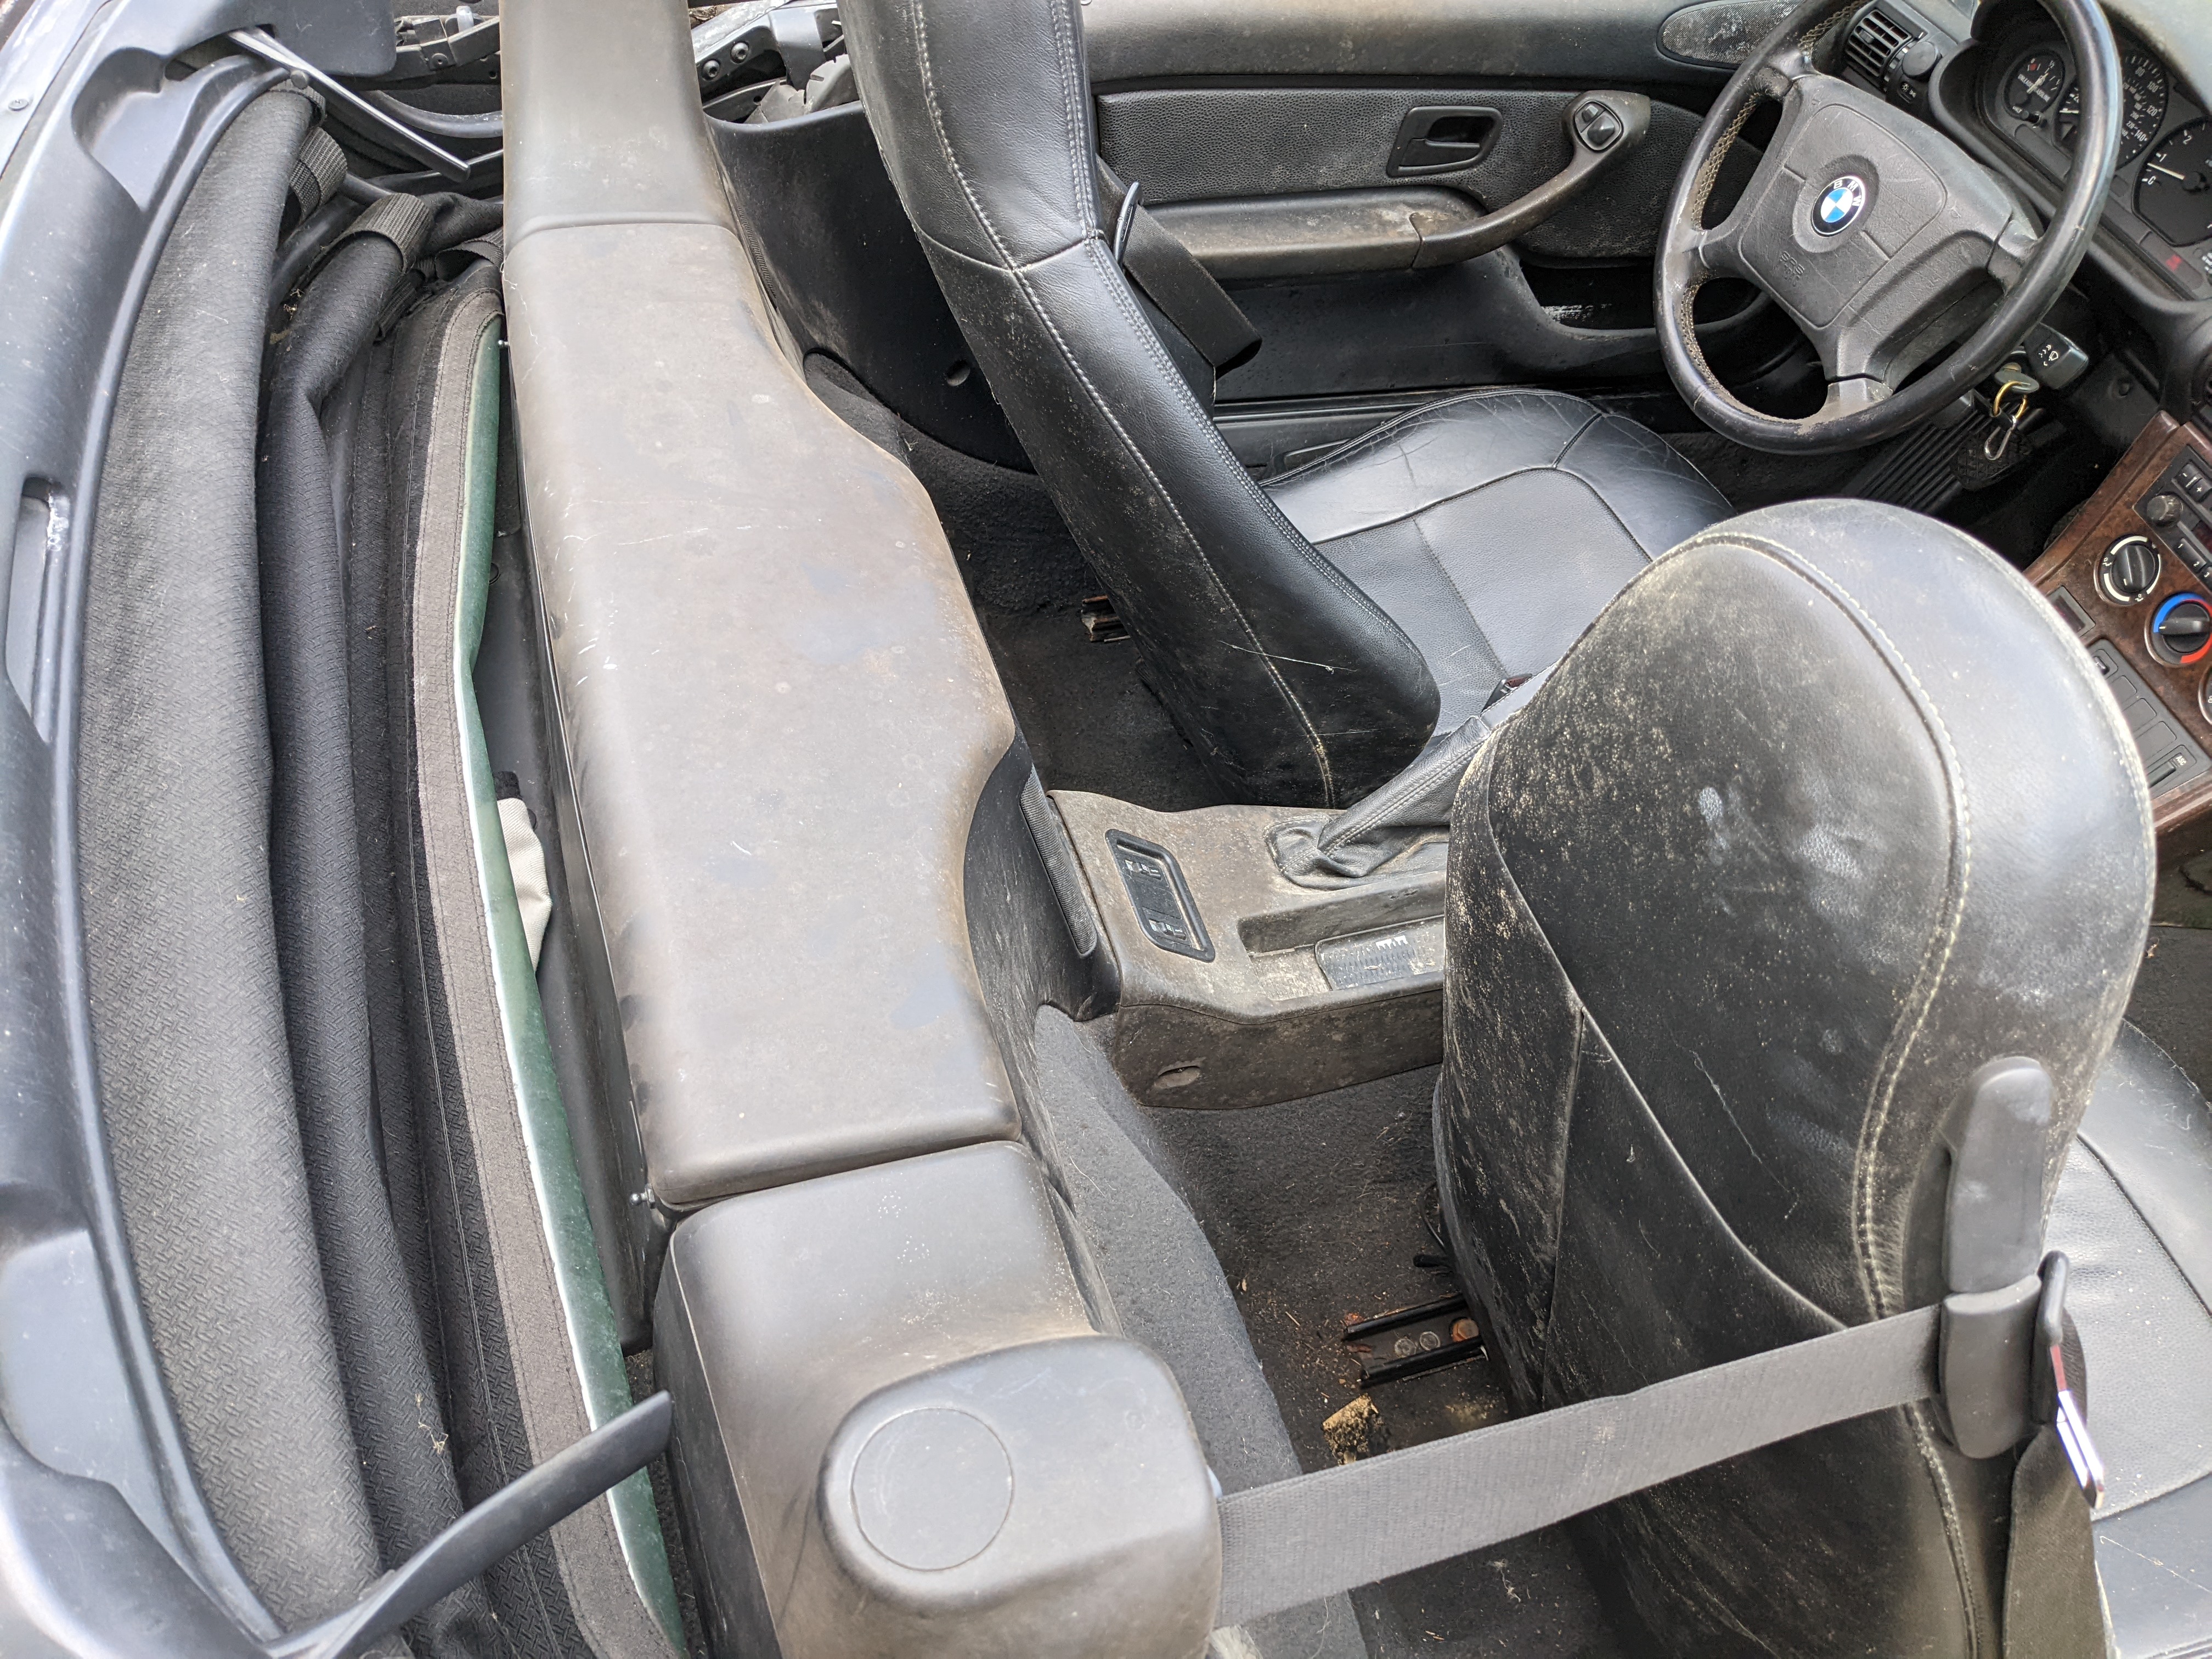
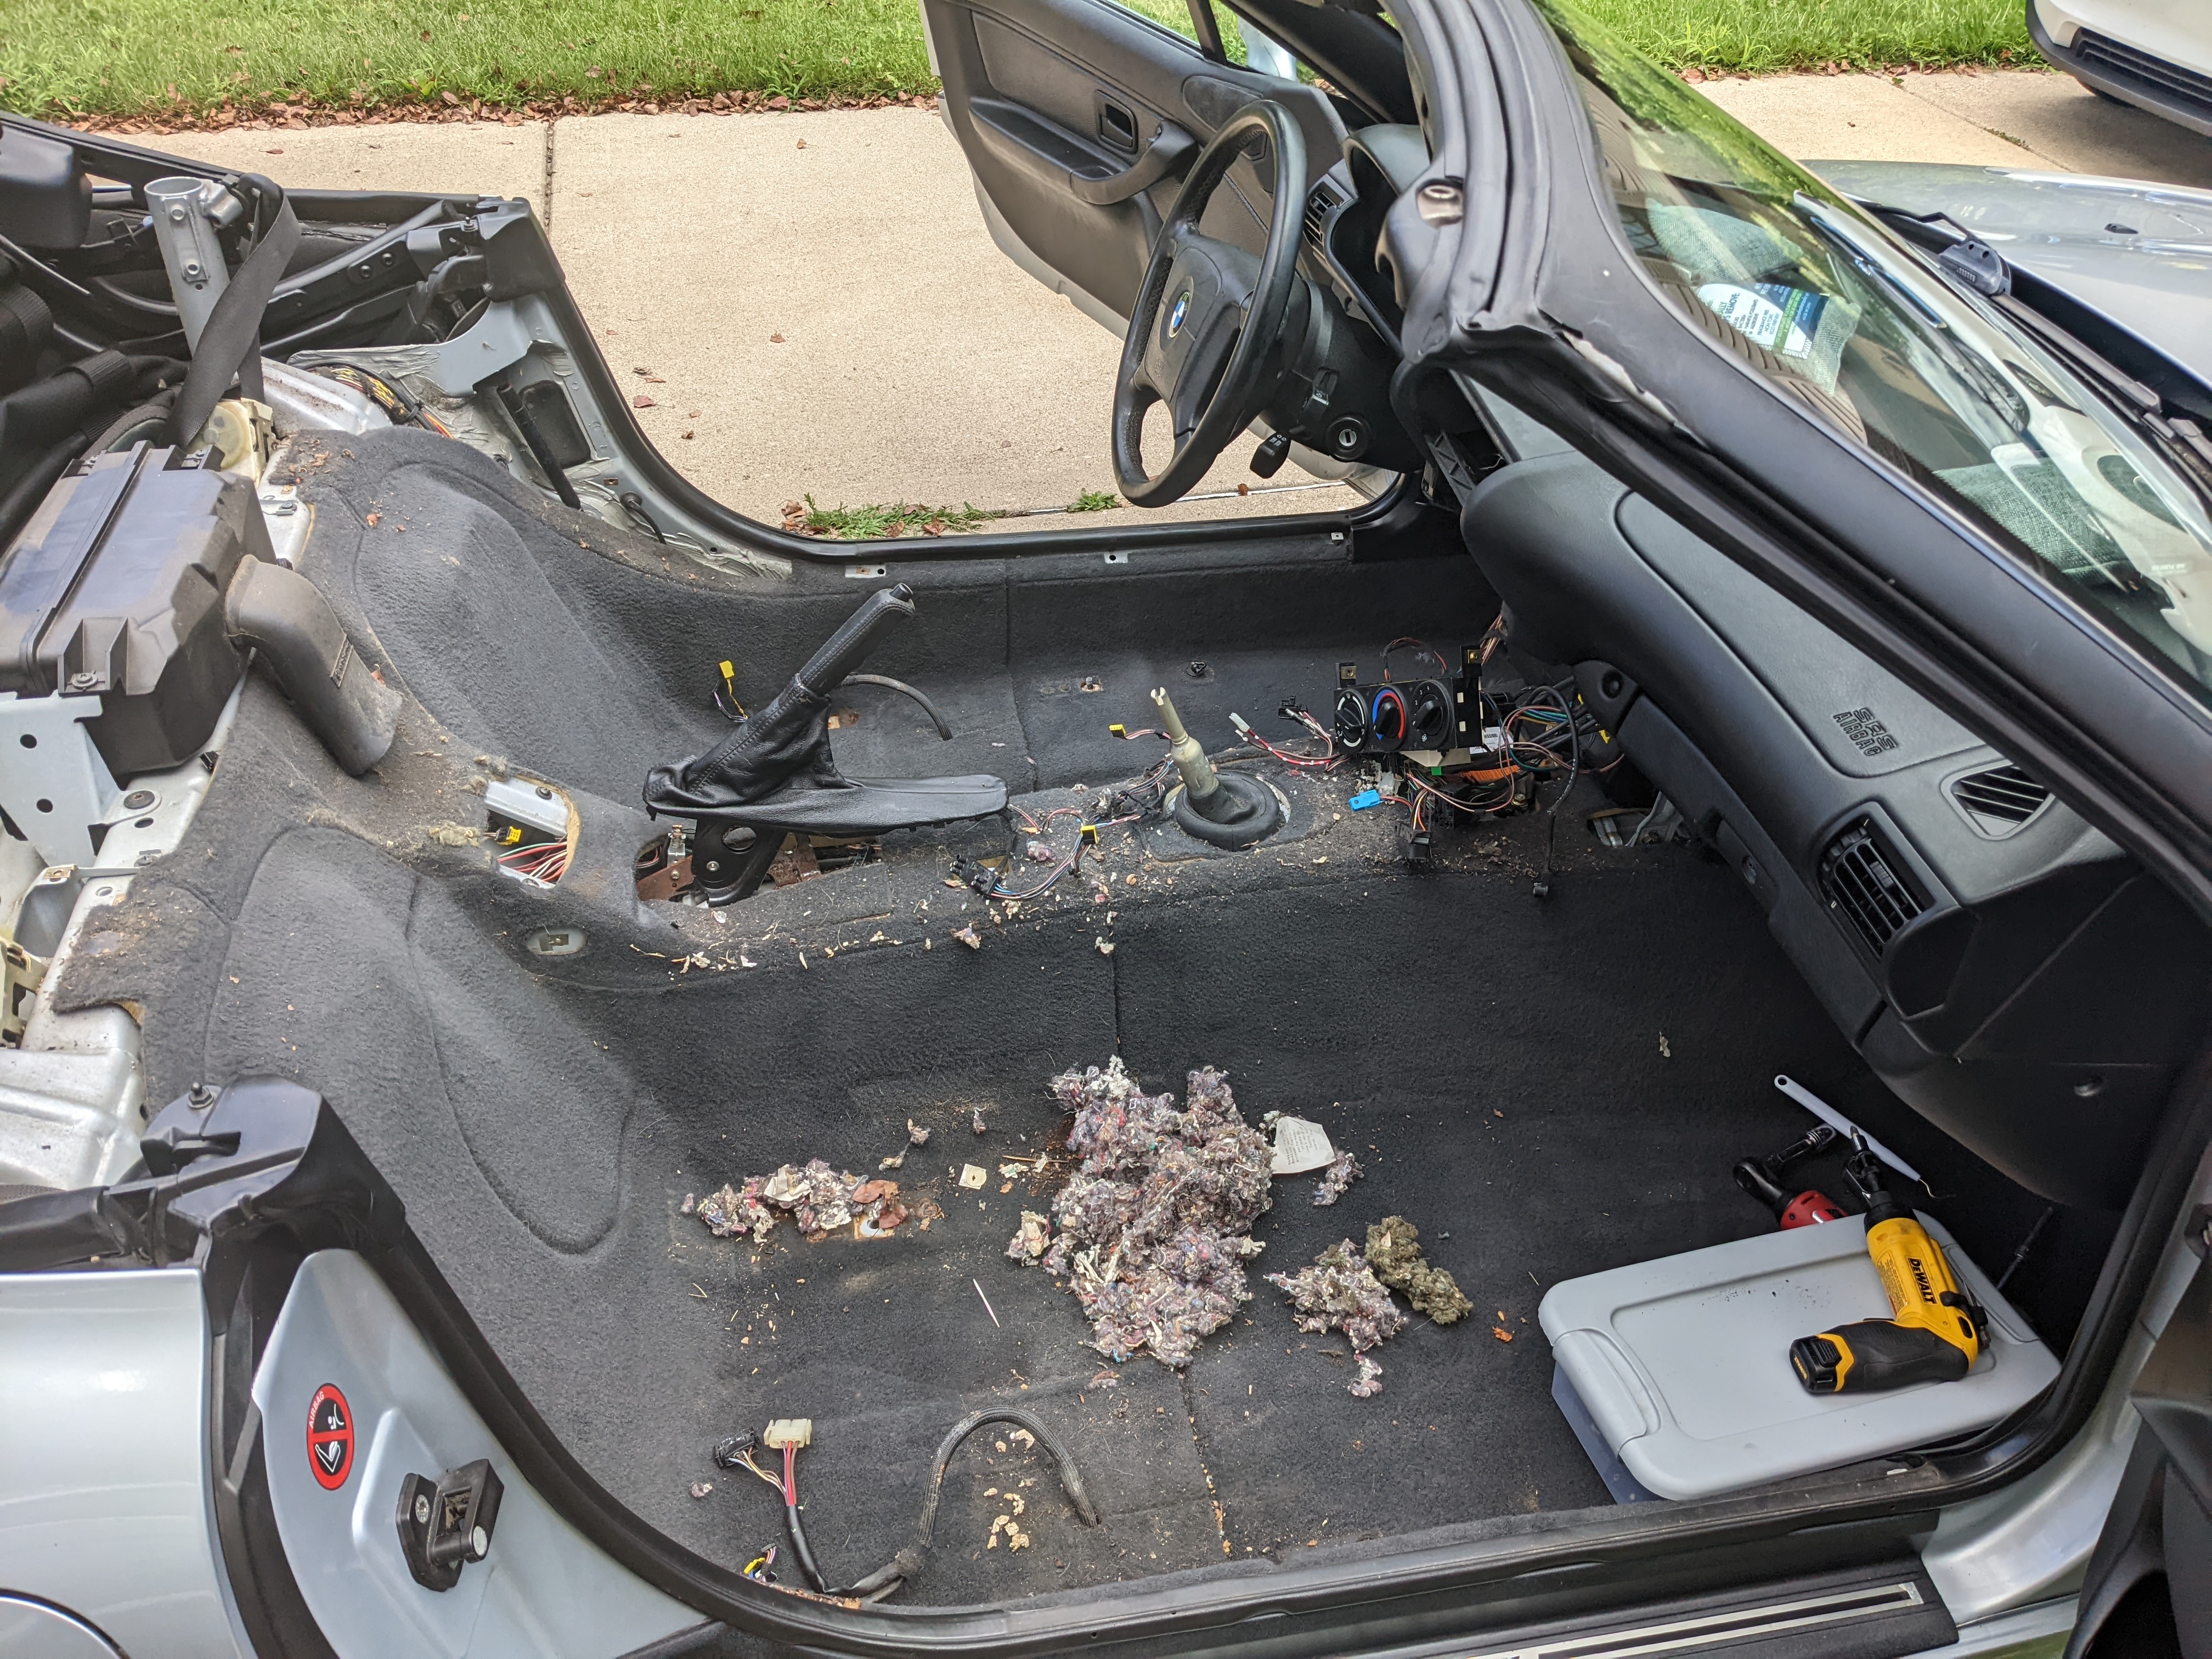
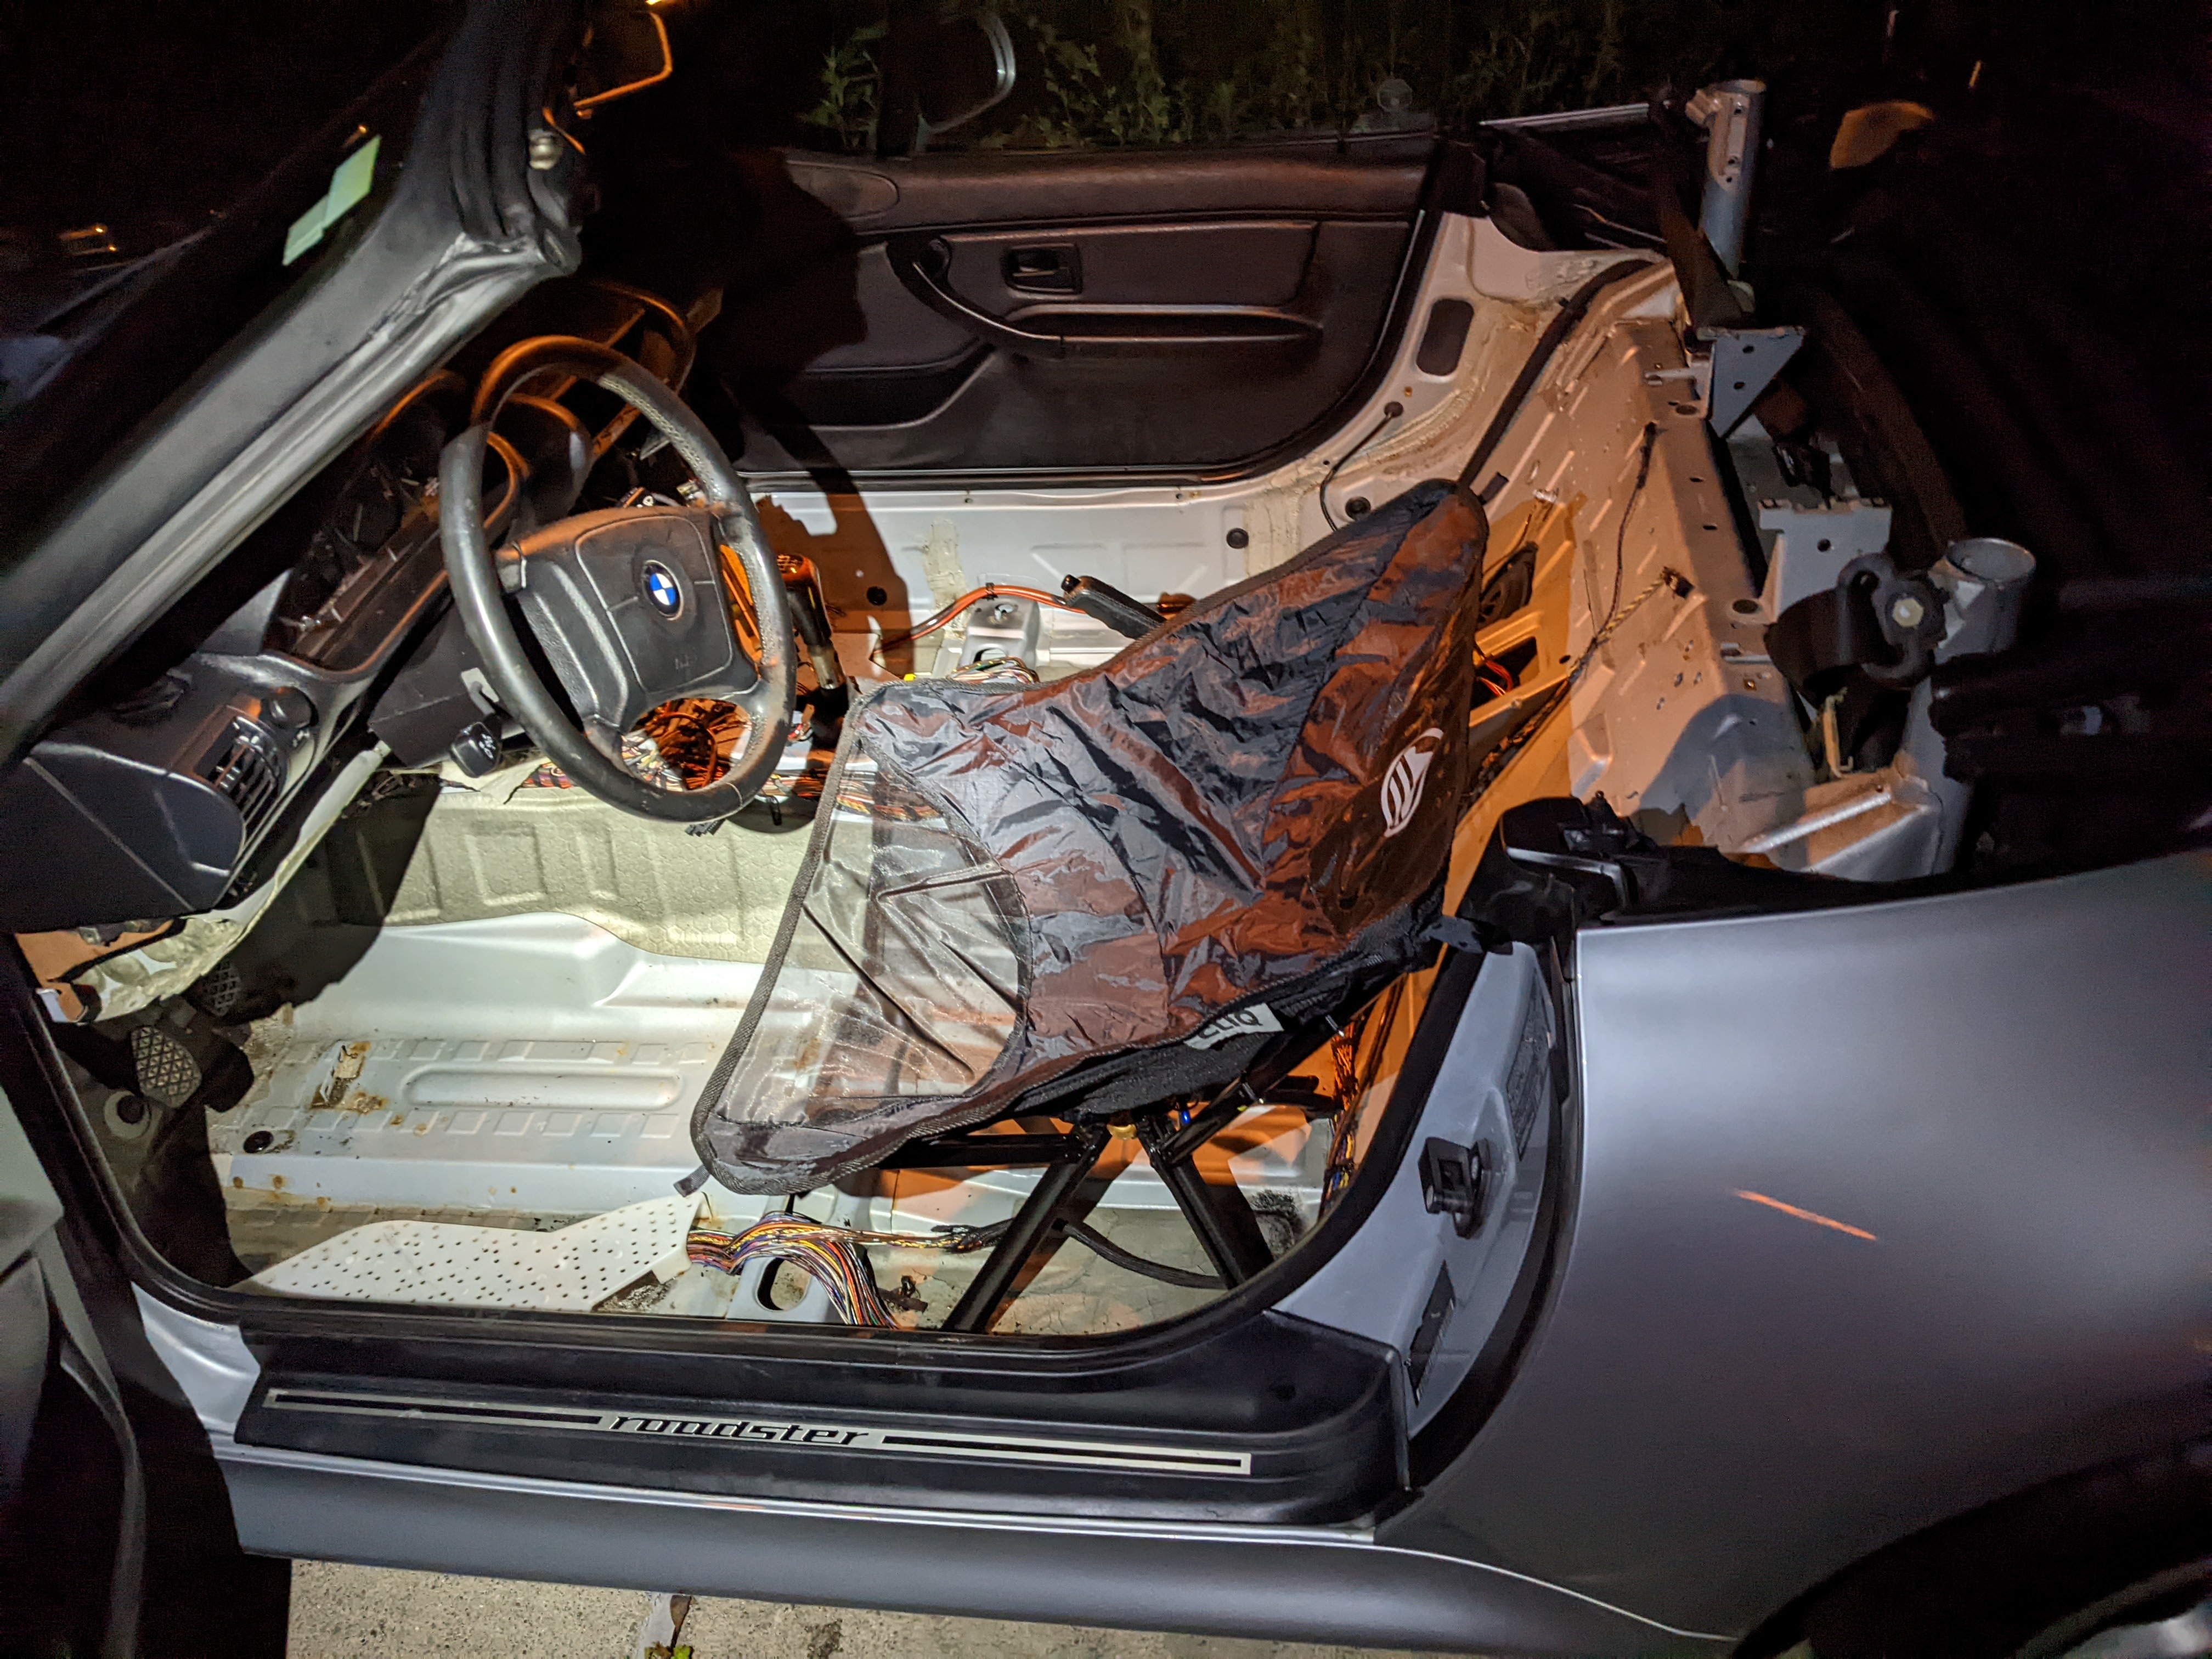
After this, I took a look at the drivers seat. It didn’t want to tilt forward or recline at all. The passenger seat would move if pushed, but didn’t tilt forward by itself. So I took the drivers seat out to see what I could do. Then I found the water. Stepping where the drivers seat was to remove it, I heard a squish. I lifted up the carpet, and saw this:

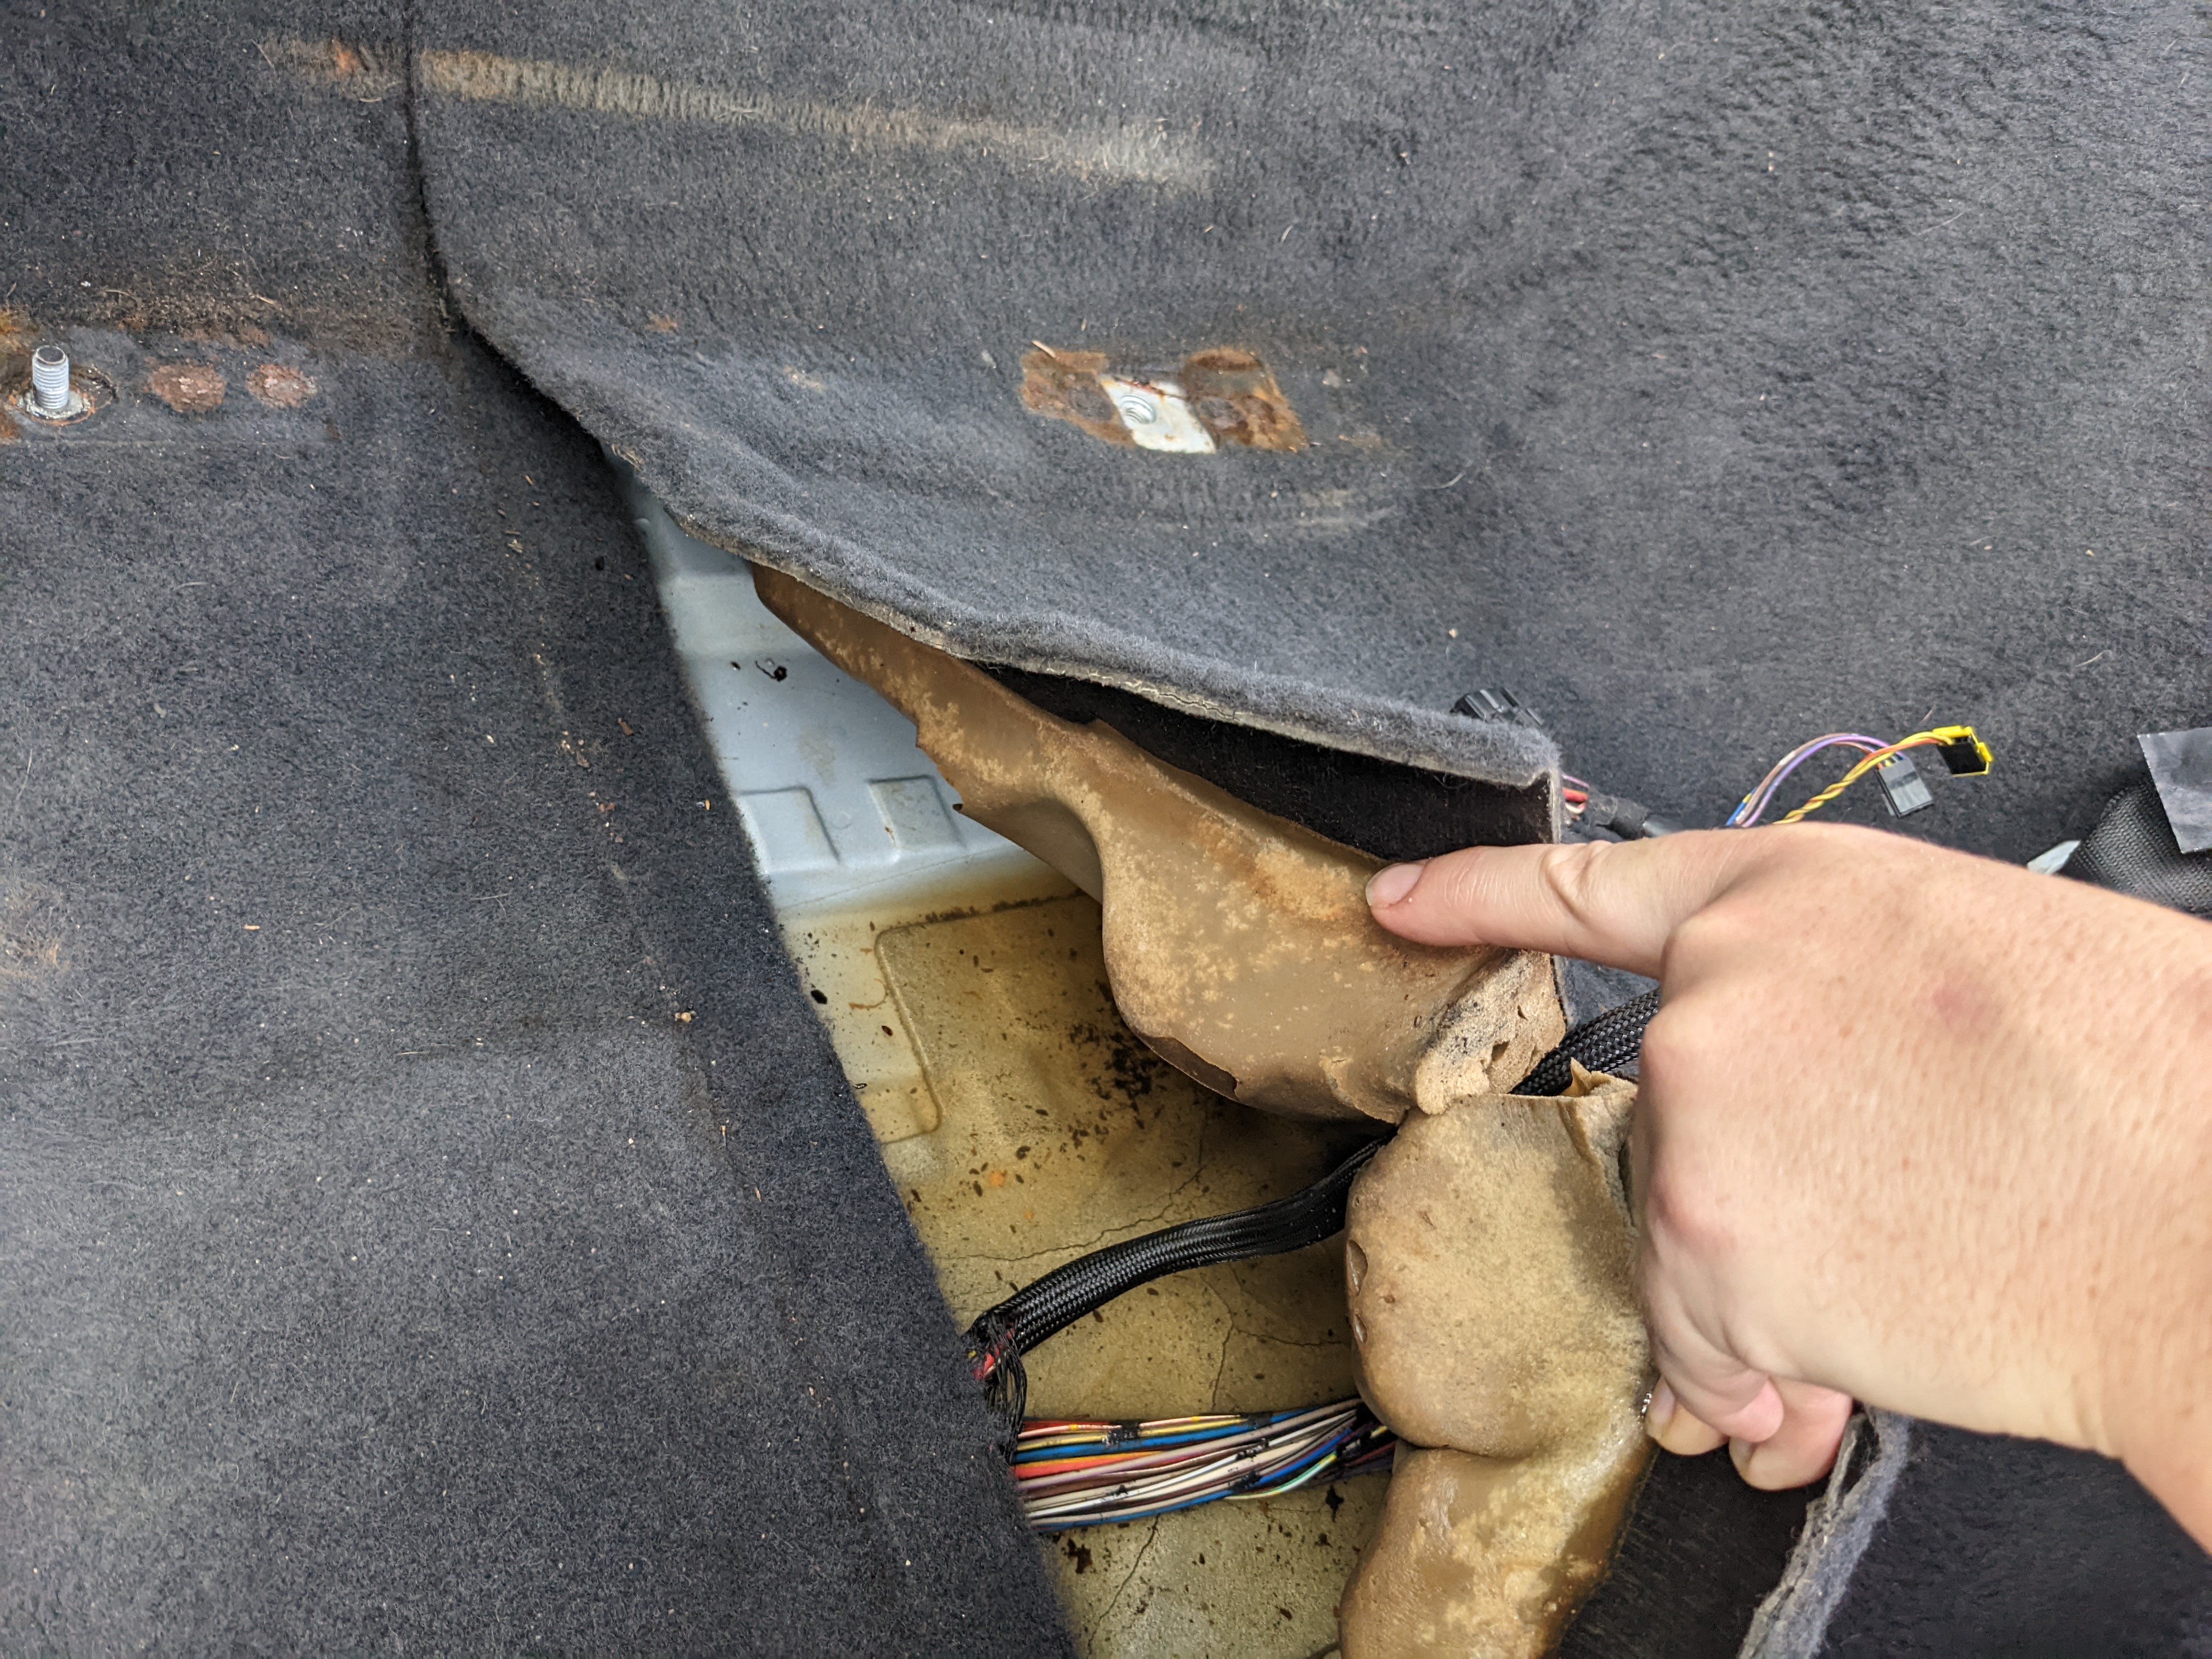
This is when I decided to take the day off work, and remove all the carpet and get the water out.

There was also some animals that got into the car and left some messes, but so far I haven’t found anything beyond chewed foam and dirtiness.
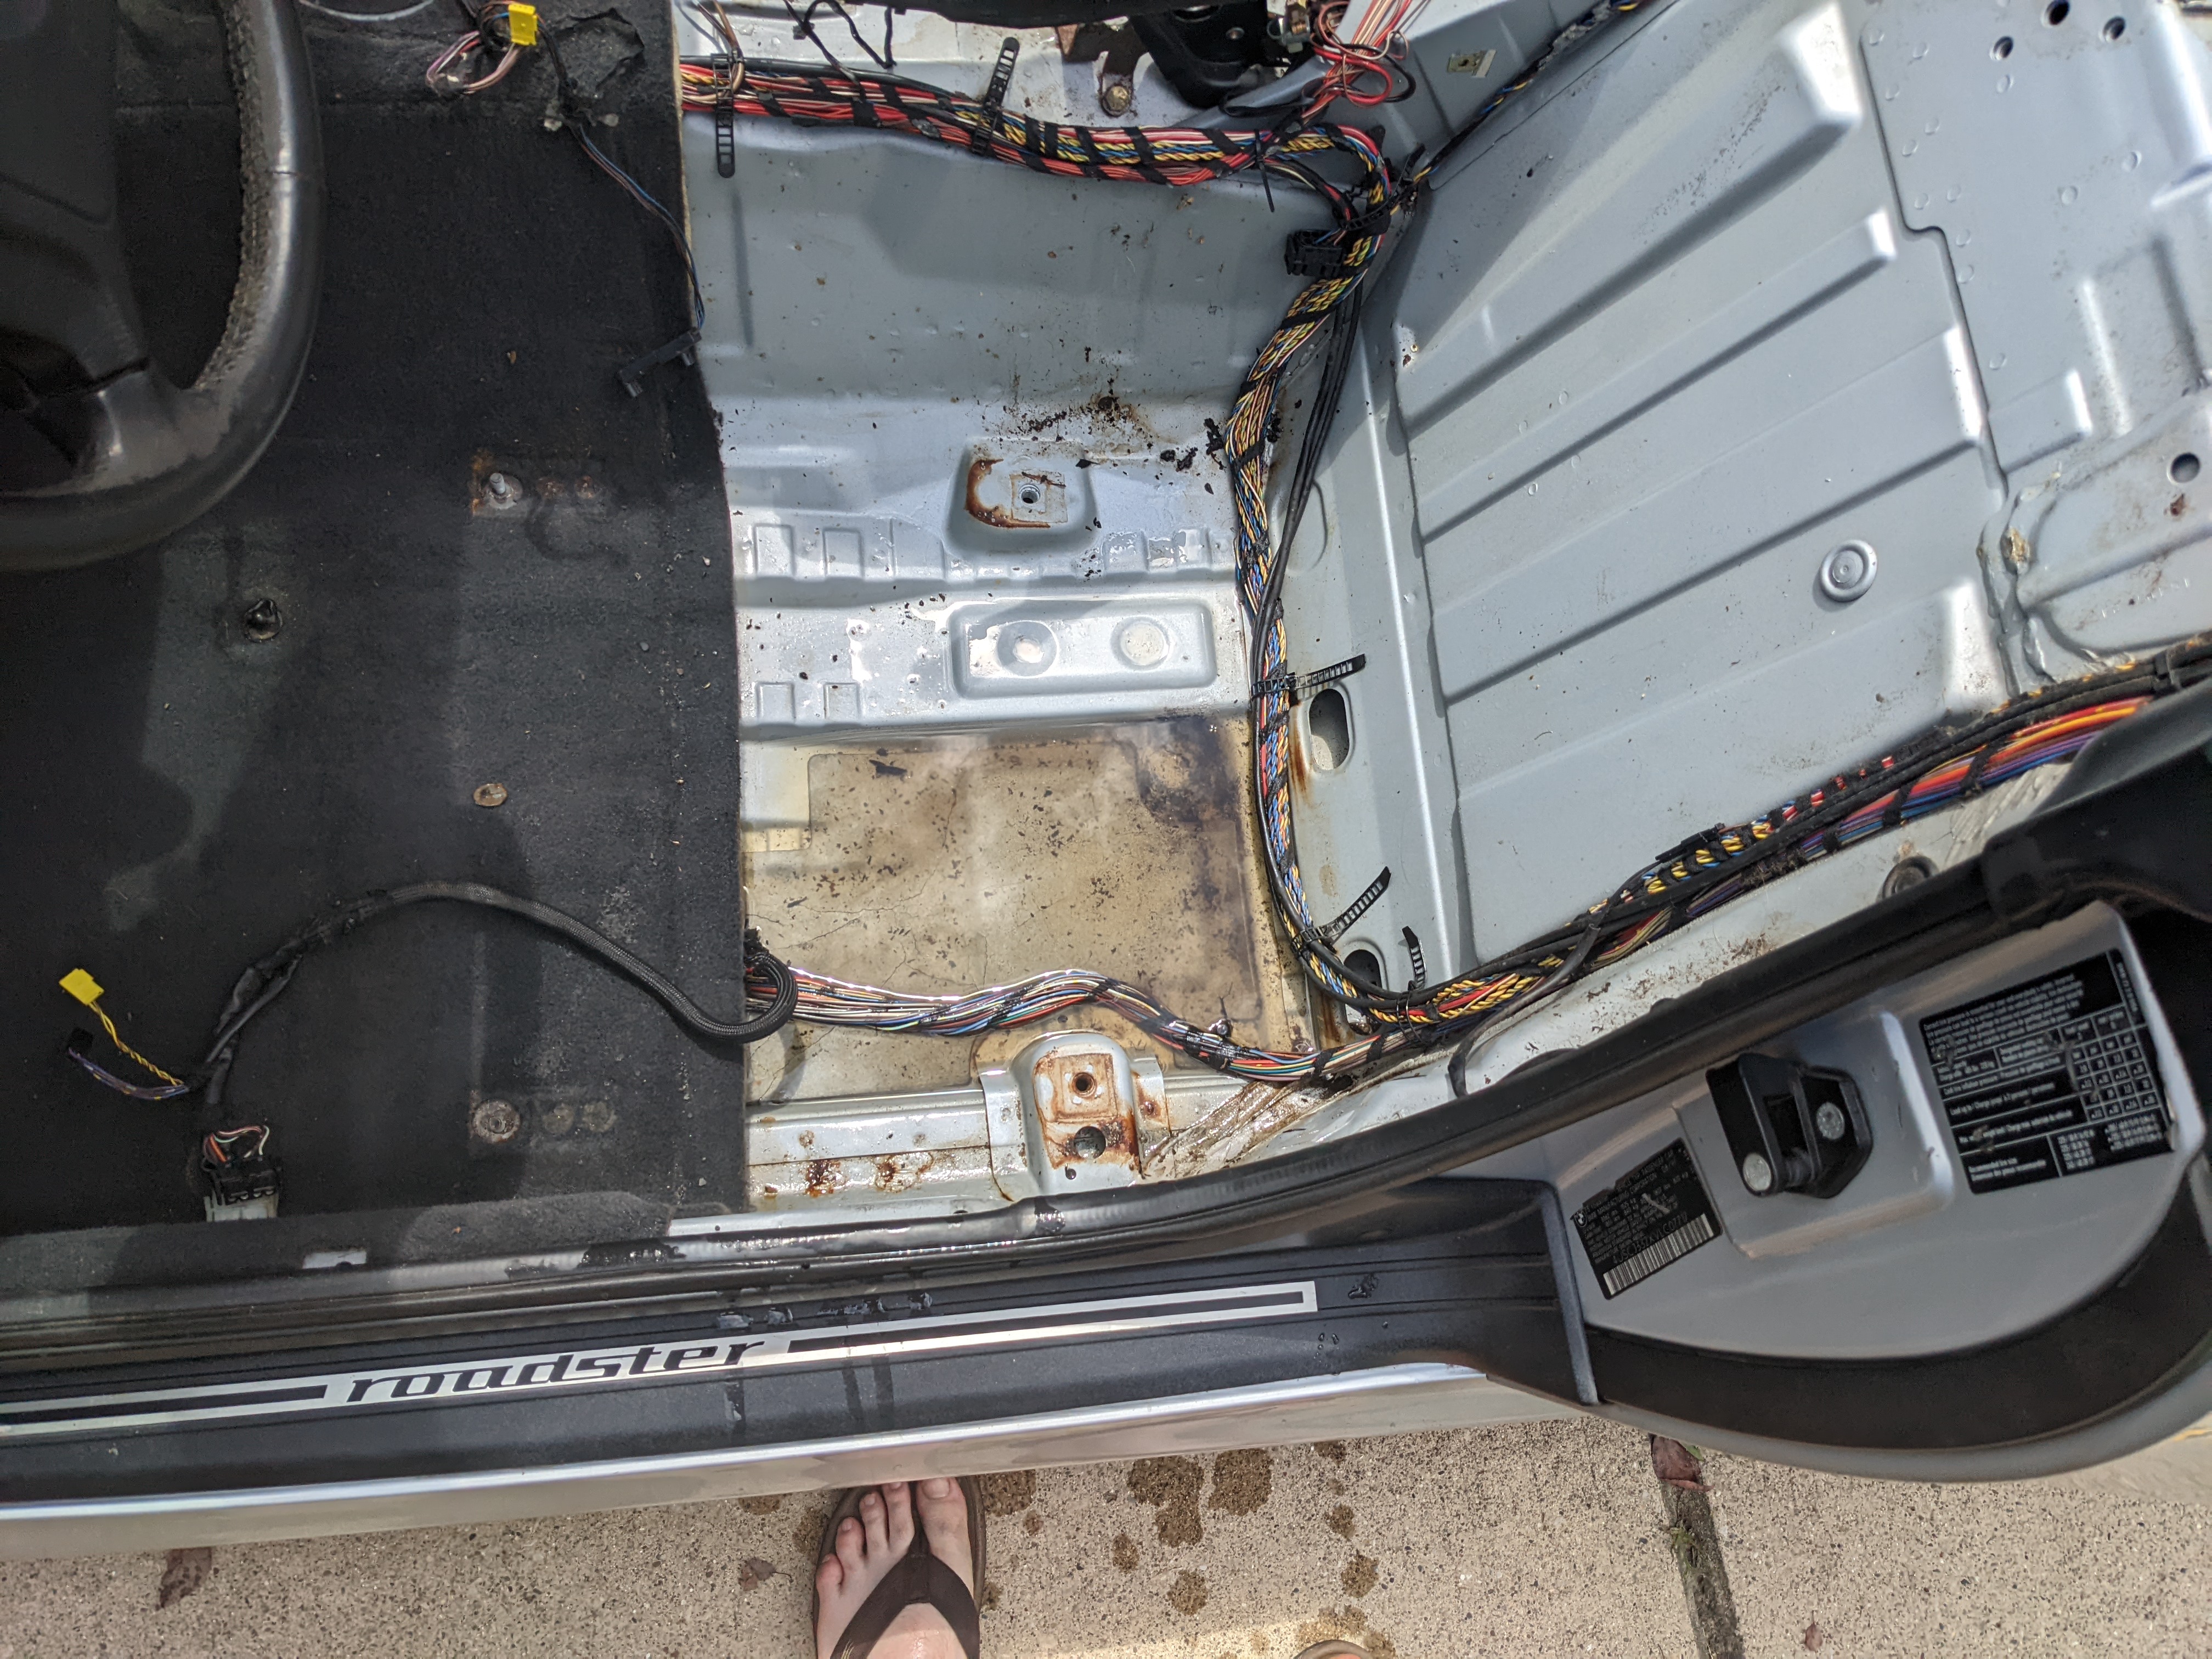
I had to take the entire center console and a ton of the trim pieces off to be able to get the carpet out.

The foam absorbed so much water. I walked on this to squeeze it out, and left it in the sun to dry. I could still step on it at see more water come out a couple days later (video below).

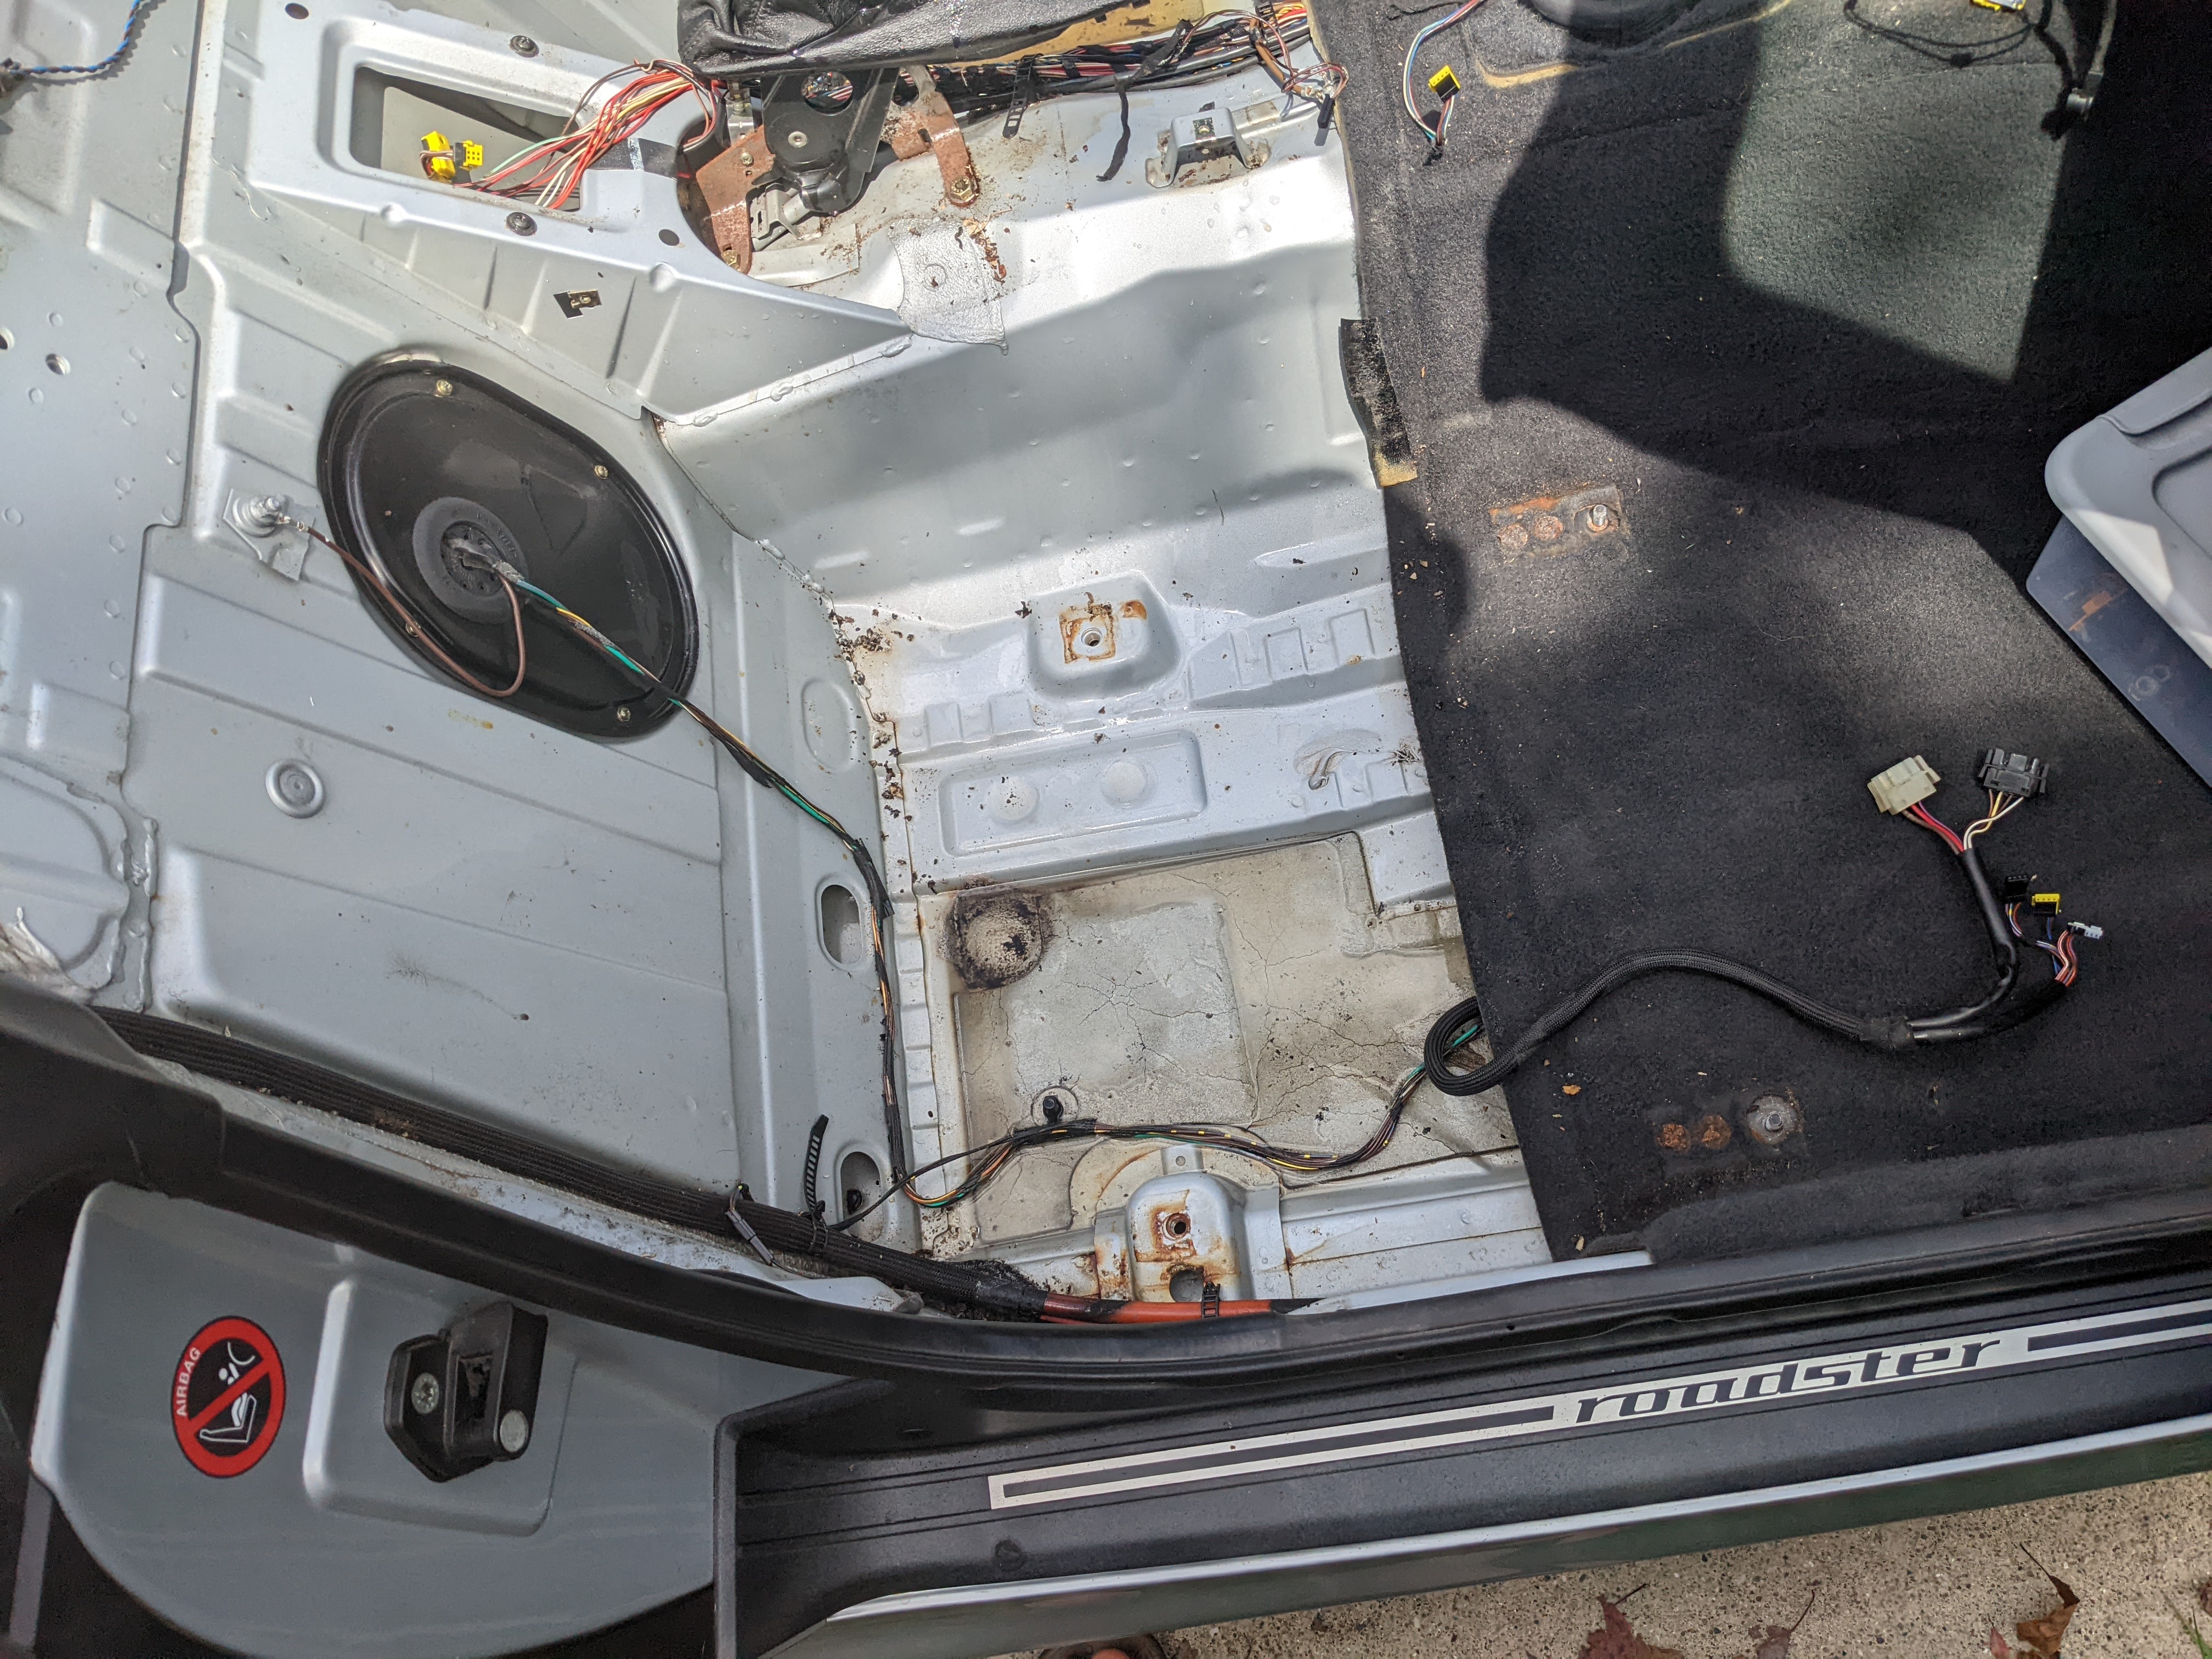
The trunk was not spared either, that also had standing water in it.

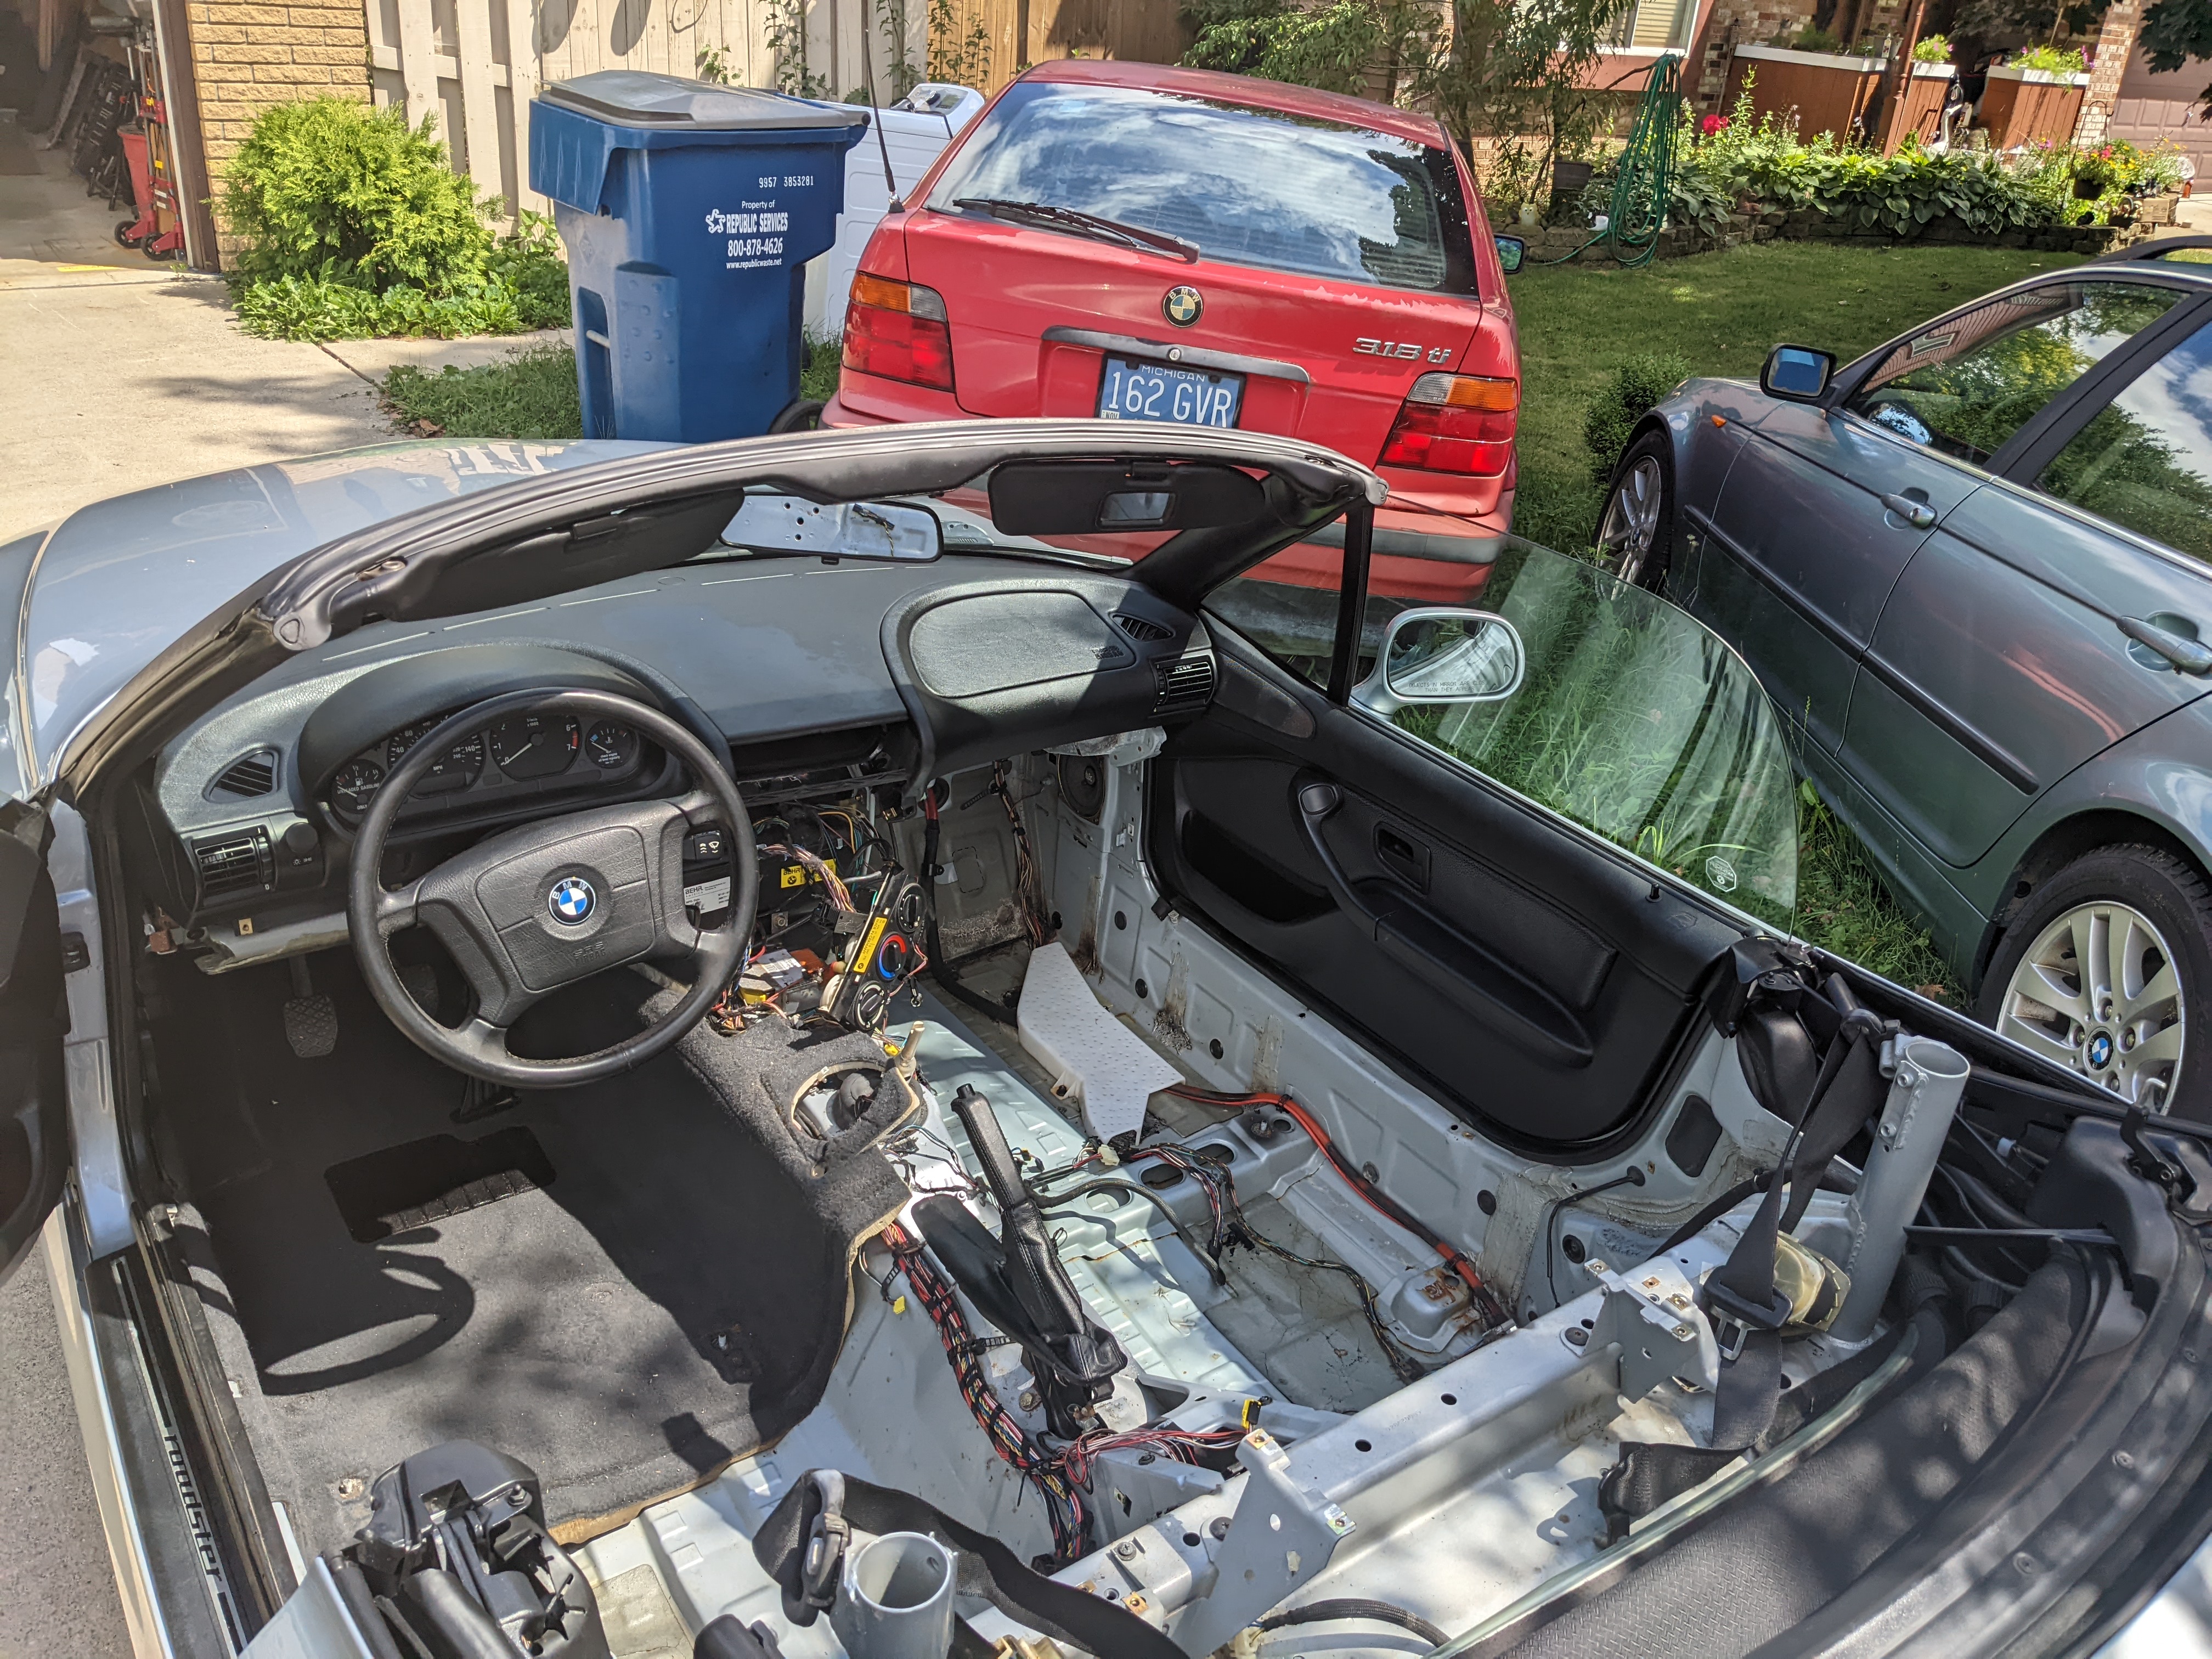
Unfortunately the front half of the carpet goes under the heater/AC/blower or part of that system, and it seems like I’d have to take the dash off to remove that, so I cut the carpet instead. The places I cut should be behind trim pieces, so if I can reuse the carpet, hopefully you won’t even be able to tell.

Next, I had to remove the gas pedal to remove the driver’s side carpet. I took a picture to help figure out how to remove it, and found there was a circlip to unclip.

Got the pedal out, and the carpet out. I found a very corroded connector below the dead pedal. I still have to dig through the service manual / wiring diagram to see what that was for, it was unused at least. I also did find one wire I should splice below the drivers seat, the insulation rotted away on a tiny section.

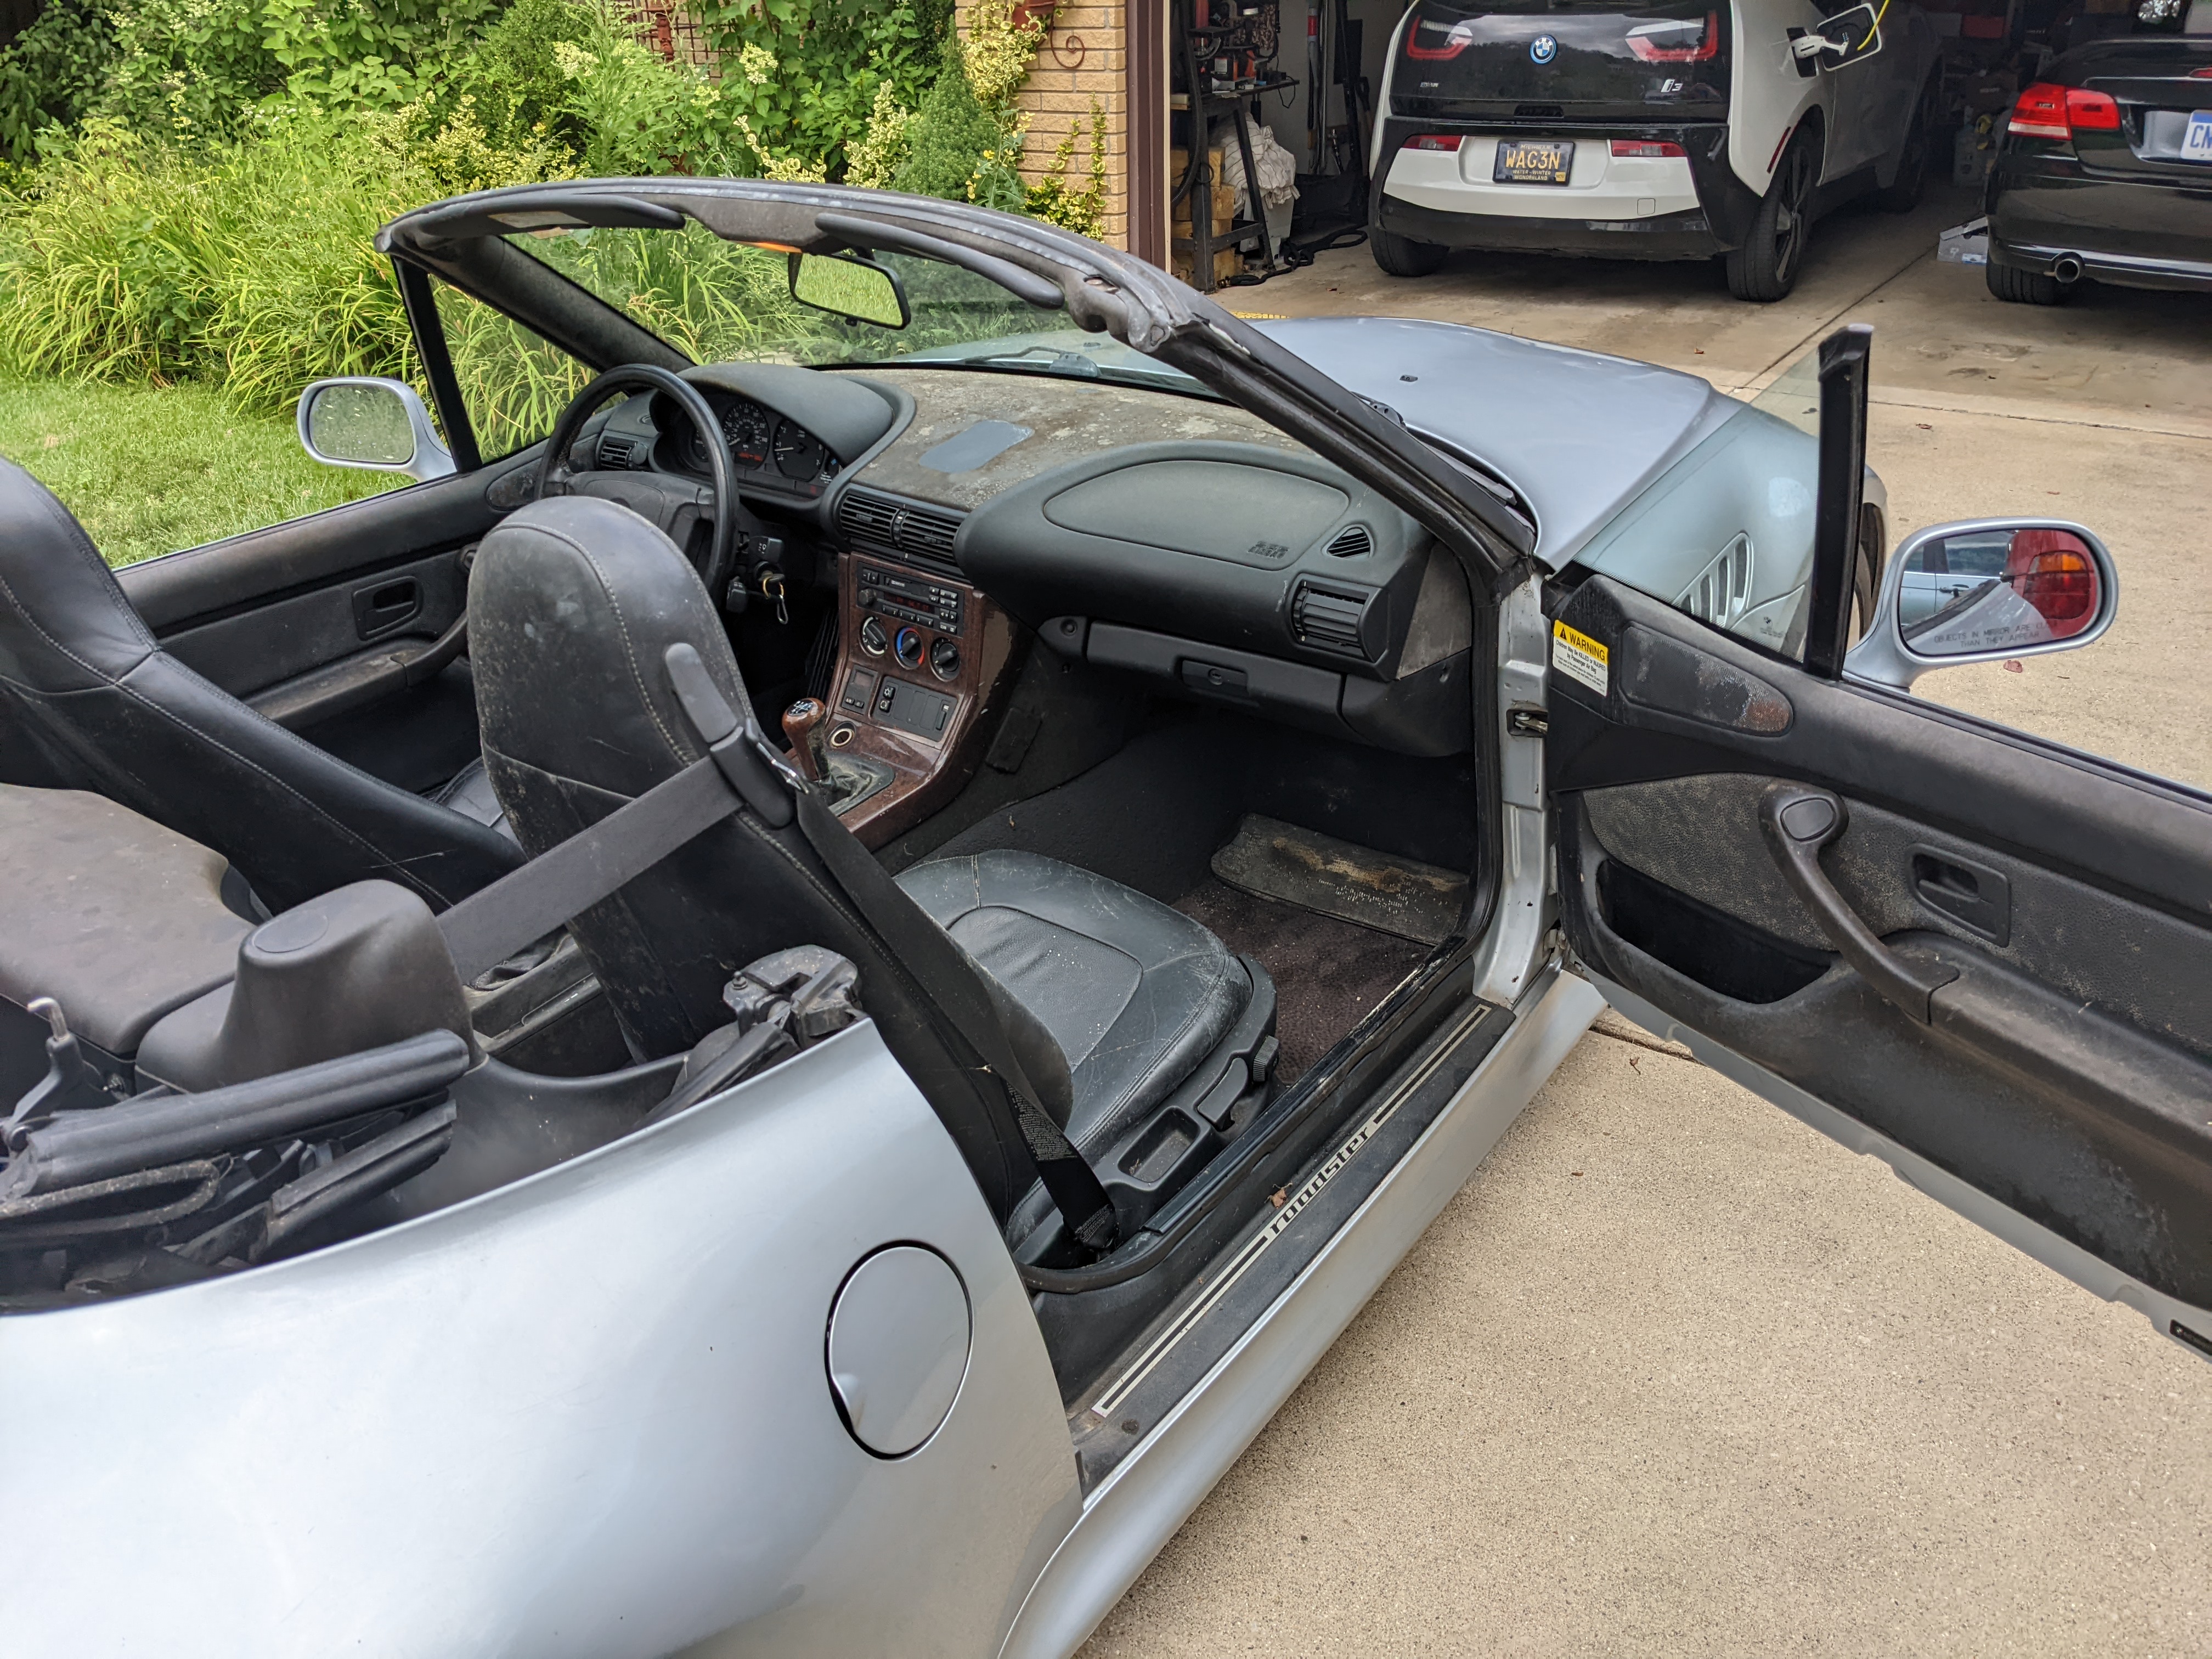
I had to move the car around the driveway, and didn’t want to put the original seat back in, so I made something else work 😀

Also, in taking this apart, I discovered that this car has no rollover protection. The newer convertible has explosive or spring loaded roll bars that pop up once the car detects that it’s starting to roll. This car doesn’t have that. There are at least mounts for OEM roll bars, but the car didn’t have them. I ordered a set shortly after learning this.

here’s me stepping on the carpet to squeeze out some of the water:
https://photos.app.goo.gl/zDhB5fV6u7zLqQo56

Current Car projects status

I have found myself with way too many cars (and as of right now, they’re all BMWs…), and a lot of projects.

Two I’ve had for about 10 years now! The summer car, a 335i convertible, I’ve had for the longest. Shortly after that, I got a 325xi wagon for my winter / all around car. Both of those are semi-automatic transmissions, with slapsticks (and the 335 has paddles too).

I’ve always wanted to be able to drive a manual transmission, and while I knew the concepts, it wasn’t second nature to me. I figured the only way for me to learn to level I wanted was to get a manual car and drive it. A few years ago I started looking for the cheapest manual cars I could find. I looked at a civic, and a saab, but neither were great. I eventually found a 1995 BMW 318ti for sale, it was a little bit more than what I was hoping to spend, but not much. I checked it out, and it was in much better condition than the other cars in that price range I had seen. The interior needed some work, but that was all non-essential stuff. I could still use the car in the condition it was in. I didn’t even haggle on the price, I just paid the asking price. I drove that car here and there for a year or two, then it turned 26. In Michigan, that means I can register it as a historical vehicle, which costs much less than normal registration and insurance is also a lot cheaper. It makes me have little interest in getting rid of this car, it’s so inexpensive to keep.

Earlier this year, the wagon has some issues, and I wasn’t able to get it diagnosed in a reasonable amount of time (and it seemed like it might be the transmission), so I decided to get another car instead of fixing the wagon. I wanted an electric car, and a used one (since I’m planning on getting a new electric truck once they’re… more available), so looking at the options, there was a pretty easy choice for me. The BMW i3. I found a 2015 with the range extender in Nashville. My dad and I drove down to pick it up, trailered it back to the kentucky/ohio border, then I drove it back from there.

Eventually I was able to get the wagon diagnosed, and it’s just the CV joint. I had jiggled it out of position when seeing how bad the CV joint was, and if I needed to replace it, and some transmission fluid leaked, and it stopped changing gears. During the diagnostics, they reseated the CV joint, and now the transmission shifts and putting it in park holds the car stationary again! But the CV joint is still shot, and it’s not drivable due to that. I’d like to fix that at some point, but it’s lower on the priority list now.

The last car was even more unexpected. My uncle had a BMW Z3 convertible for maybe 20 years now. Sadly a couple years ago he unexpectedly passed away, and the car sat for a while. It wouldn’t be a Z3 if it didn’t have a roof leak, so unfortunately that meant it was in pretty rough condition. I helped my aunt get it started again, and at least drivable so it could be taken in for detailing and cleanup. After that, she decided that I would be a better steward for the car, and would appreciate it more, so she gave it to me ❤️
This has been the main car project this summer, and is definitely still ongoing. There were gallons of standing water in the floorboards when I got it (though I didn’t discover that for a week or two), and mold growing on the dash. First thing I did was to have it detailed, and it was better. Then I found the water under the carpets, and took that day off work and completely removed the interior of the car. there is not a single piece of carpet left in it. I’m hoping I’ll be able to reuse all the carpet, but I’m not sure yet.

How to upgrade the Xbox One hard drive

My Xbox One came with a 500GB hard drive. It’s not that fast, so I used a USB3 SSD for games instead. Recently though, I’ve started to notice how loud the hard drive is (it’s the loudest thing in my entertainment system), so I decided I wanted to replace it with an SSD.

I tried following some instructions and running a script from a github repo, but that method didn’t work for me. I was looking around the web and the only place I found another method mentioned was a youtube comment on a tutorial video that used the method from github. 100% of the credit for this method goes to Skyliinez92 on youtube. I just felt that a more easily linkable, more permanent place for this information would be nice.

I would recommend having a disk larger than the one currently in your xbox for the upgrade. It’s possible to go down in size, but doing that safely is more difficult.

I’m not gonna explain how to open your xbox one, there are plenty of guides out there. The best one is probably on ifixit here.

When you have the hard drive out, you can proceed.
There are 2 tools to use, both are free. Clonezilla and GParted.

First up is Clonezilla. Download the live cd and burn it (or use unetbootin and put the image on a thumbdrive). Boot to the live CD with your original xbox one hard disk and the new hard disk attached. I recommend disconnecting all other hard drives to avoid any risk of data loss.

Start clonezilla. Choose device-to-device.

2016-11-08-12-01-02

expert mode:

2016-11-08-12-01-11

disk to local disk:

2016-11-08-12-01-16

choose the correct source disk, then the correct target disk. Make sure you get this right, since you really don’t want to erase your xbox one drive at this point.

skip fs checking:2016-11-08-12-10-09

use the partition table from the source disk:

2016-11-08-12-10-13

At this point you should get a lot of confirmations making sure you’re not overwriting stuff you care about. Then you should get a progress dialog. My 500GB drive took with a little data on it took less than 2 hours. It shouldn’t take very long.

If you’re just replacing your drive with one of the same size, your drive is done, scroll down to the “Testing your drive” section.

If you replaced your drive with a larger one, you now need to boot into gparted. I would disconnect your xbox one hard drive now, just to leave it alone. Put it in a safe place and don’t lose it. There’s always a small chance an update could break the xbox with an upgraded drive, so hanging on to your original is the best way to not end up with a brick.

Boot into the gparted live cd. go through all the keymap stuff, you probably want all the default options. once the UI is loaded, launch gparted. In the upper right, select the new xbox one hard drive. There should be 5 partitions, it should look a lot like this (though note I modified this one to be smaller than the original 500GB disk):2016-11-08-12-13-56

you need to move the 3 System partitions to the end of the disk, 1 at a time. Click the last partition, resize / move to the end of the free space, then do the same with the middle system partition, then the first one. You might get a warning like this, that’s ok:2016-11-08-12-14-11

at this point your disk should look similar to this:

2016-11-08-12-14-35

Now resize / move the User Content partition, and resize it to fill all the available space. Now you can click apply, and these operations will be performed. It might take another hour or two, once that’s done, shut down gparted and put the drive back into your xbox.

Testing your drive

Now that your drive is prepared, I’d recommend testing it in your xbox before putting everything back together. I put the drive back in and connected it, but didn’t screw it back together. I hooked up the wireless card and the antenna (though the latter isn’t absolutely necessary). The top case with the power button is difficult to put back on, I wouldn’t for testing. Since the power button is capacitive, you can just touch the right spot on the connector and the xbox will power on. Check out a video of this here.

Give it a few minutes to boot, hopefully you’re all set. Good luck!

Tiny CRT Display

I had an old camcorder that was pretty useless. It used VHS tapes (so it was HUGE), but it also didn’t work properly and would eat the tapes sometimes. I decided to take it apart to see if I could do anything cool with it. I found that the viewfinder was a tiny CRT display. I tried to hook it up externally to use it as a display, but I didn’t know much at this point (I was maybe 13 or 14) and probably fried it. I later read online that a lot of video cameras with old CRT viewfinders just took composite video and power for input. I went to the local freecycle forum and got an old camcorder with a CRT viewfinder. I took it apart and took out the viewfinder.DSC_0374This thing is tiny. I think it’s around 0.5″ across. I figured out the pinout of the driver board and hooked it up to 5v and composite video, and it worked great. I wired up a 5v regulator to a 9v battery clip, as well as a 5v input on a molex connector, and wired on a composite video lead.DSC_0365

DSC_0378


My mom was doing a photography contest where the theme was minaturization, so I made a little cutout of a old TV and we took a couple pictures:

DSC_0387

Skylark Headlights

Since I was driving an old car, I figured why not have some fun and modify it a little. I always thought the LED outline of the Audi headlights looked sweet, so I set out to put some on this car. I got some 12v white LED strip online. I soldered wire to the ends, the covered the exposed bit in hot glue and heat shrink for some waterproofing.

2012-09-08 20.05.35I also wanted a bend in each of the headlights, so I cut the strip to size and soldered a couple wires at the angle I wanted, again covering it in hot glue and heat shrink.

2012-09-08 20.05.27This is what the car looked like before with its park lights on:2012-09-08 20.11.28This is after:

2012-09-08 21.19.19Not quite as bright during the day:

2012-09-09 14.00.52

These lights worked great and stayed on the car through a Michigan winter before the car broke beyond repair (brake line rusted through).

Skylark Automatic Passenger Window

A couple summers ago I was driving a 1996 Buick Skylark. Unfortunately it’s air conditioning was broken, so since it was hot out, I would immediately roll down both front windows when I got in the car. I’m kind of impatient, and the passenger side window was really slow. I got tired of holding the button down for a good 8 seconds every time I got in the car, so I decided I’d add an automatic down button just like the driver side window had.

I took out the window control unit, added a relay and a 555 circuit set to run for about 9 seconds to the control unit, a second relay to move the driver auto down button for convenience, and the two buttons.

IMG_20120603_014348 IMG_20120603_014335 IMG_20120603_014400


It worked pretty well for the rest of the time I had the car. Only problem is that it would sometimes trigger accidentally when the car was turned on. I added a bit to the circuit that really cut down on this, but it still happened rarely. I eventually had to replace both front window motors because they stopped working due to age (which is also why the passenger window was slow in the first place).

ADM3A – ancient dumb terminal

A very long time ago, on take your child to work day, I went to my mom’s office. I got some stickers for something, then I traded them for this dumb terminal (they were award points for something at the office). This is an ADM3A, from 1977. It is all discreet logic chips, no major integrated circuits. This terminal is where the HJKL navigation keys in vi come from (vi was written on one and those keys have arrows on them on its keyboard). It’s also where the ~ = home directory in unix comes from as well, the ~ key is also the home key.Image

About 8 years ago, I thought it’d be a fun challenge to get this thing on the internet. I found an old laptop with a serial port, put linux on it, and configured it to use the serial port as a console. I ended up getting it online, and on IRC and Google Talk.

I found this terminal again recently, and wanted to get it back online so I could snag a pic of it on retro.hackaday.com. Unfortunately, it didn’t seem to work anymore. I took a look at it, and the part that failed turned out to be the big clunking mechanical power switch. It had gotten dirty and corroded. I took the switch apart and cleaned it out, and now it works again. Amazing for almost 37 year old electronics.

This time, however, I didn’t have a laptop with a serial port handy, so I made a MAX232 serial adapter for a raspberry pi and hooked the pi up to the terminal. The serial adapter is just a typical MAX232 circuit, I pulled it right out of the datasheet, page 7. You can get these things on ebay for a couple bucks, but I had a couple MAX232 lying around and I figured I could put a header for the pi right on the board, instead of having to make an adapter cable. I only bothered to hook up the tx and rx lines, I skipped DTR and CTR. I used a standard serial port header like motherboards used to have for the serial connection, so I could easily swap between 25 pin serial (which the adm3a has) and 9 pin serial. I had a bunch of the serial port header cables on hand as well.

Here are a couple pictures of the adapter:

ImageImage

On the software side, the pi is running Wheezy. This serial terminal runs at a max speed of 19200 baud, but I went with 9600 baud (because it’s a common default). The pi had a lot of config for using a serial terminal at 115200 baud. I got most of my information from this article describing how to use the pi as a serial terminal and what to disable to prevent it being a serial host.

In /boot/cmdline.txt, I made sure console and kgdboc (kernel debugging) were set to the serial port on the header and to the right speed

console=ttyAMA0,9600 kgdboc=ttyAMA0,9600

In /etc/inittab, I changed the getty line for the serial port to the right speed, and defined the term as adm3a, since the adm3a predates the vt100, isn’t fully compatible, and has different control characters (e.g. the arrow keys on hjkl. the only way to delete characters is ^h).

#Spawn a getty on Raspberry Pi serial line
T0:23:respawn:/sbin/getty -L ttyAMA0 9600 adm3a

I added a TERMINFO location definition to my .bashrc

# set terminfo location to location with adm3a
TERMINFO=/usr/share/terminfo

I was a little surprised to find that Wheezy still includes terminfo definitions for terminals this old (and older). The terminfo directory is 6.5MB.

After these changes and a reboot, the pi printed its console correctly to the terminal, with lots of beeping too.
Some programs don’t run very well on the terminal, anything that tries to do color just has all of its control characters displayed on the screen. lynx was unusable without the correct terminal definition.

2013-10-20-05-39-26

Flip Top Xbox 360

I made a flip top Xbox 360. Other than the flip top, it is completely stock. At first, this seems rather useless, because you can’t do swap tricks or anything similar like you could with older consoles (e.g. PS2, PS1). You can’t play burned games or anything with this console either. It’s good for a single thing: avoiding buying a second copy of a game to play it on a second console. It’d be great for LAN parties. I use it for achievements.

In Halo 4, there’s one where you need to beat the campaign on co-op. None of my friends had Halo 4 at the time, and there’s no matchmaking for campaign in Halo 4. So I just fired up this console with Halo 4 and had it join my game on my main console and did coop by myself, but I didn’t have to split screen.

Here’s how it works: the 360 lets you install games to the hard drive, which saves wear and tear on the laser, and makes the console much much quieter during use. When a game is installed, you still need to put the disc in the tray, so you can’t rent a game, install it, then return it and still be able to play it. If you have a scratched disc, but the console still recognizes it as the game, you can borrow a working disc and install that, then just use your scratched disc to launch the game. The cool thing is that the console only checks the disc during boot (and for a minute or two after boot). So I can install the game, then boot it, then open the flip top and pull out the game (without the console knowing the drive opened) and put the game in a different xbox. If the console knows the drive opened, it goes right back to the dashboard.

Here’s what the console looks like:
2012-12-09 01.06.02

I used parts from a local hardware store, and unfortunately that know was the smallest I could find.. That’s the only thing I really dislike about this mod.

Here’s the front of the xbox:

2012-12-09 01.06.18

I had to cut the plastic that goes over the front of the DVD tray because the top of the DVD drive hit that on the way out. As it is, the top of the DVD drive barely clears the faceplate.

This is the top of the xbox with the flip cover opened:

2012-12-09 01.06.39

I made this as simple as possible. I cut the top of the DVD drive off the rest of the DVD drive housing. I left some tabs on the sides to help align the top when I close the cover. The black plastic circle on the top of the drive is what holds the disc in place (and it doesn’t touch the rest of the DVD drive top cover when the top is closed). A magnet holds it in place and makes sure the spindle has a good coupling with the disc. There’s (thankfully) a lot of play in the mount for it, so I didn’t need to get everything lined up exactly.

Here’s a close up of the flip top:

2012-12-09 01.06.49

You can start to see some of the finer details here. The top of the 360 case has some little plastic standoffs that go over pegs ont he front of the DVD drive. When I cut out the flip top, I left those on the actual flip part because they will help align the flip top when it’s closed (this is why there are two ‘ears’ at the front of the flip top). I used some standoffs and hot glued the plastic top to the DVD drive top while everything was closed and lined up. Then I drilled 4 holes and put some screws and plastic spacers in place to really hold the pieces together. I used a screw in each of the hinges, and two screws near the front of the drive (one on each side).

I made this a while ago and it’s held up without issue. I’ve also never had any problems with a game trying to load more data from the disc when it’s no longer in the drive.

Intervalometer

This was a very quick project I did to explore time lapse photography. An intervalometer basically sends out signals to a camera to tell it to take a picture at a repeated interval. Mine is currently set to take a picture every 30 seconds. I just used an Arduino library I found that did all the work for me. I had to write maybe a line or two of code, and the circuit is dead simple, an IR led, resistor, and a wire. I recovered the IR LED from a TV remote that had lost its TV. One of the coolest parts of this is that I don’t have to modify the camera in any way, the Arduino just emulates a Nikon remote. The camera is also completely electrically isolated from the Arduino, so if I messed up at all, there is no risk at all to the camera.

I set the camera up to do a time lapse of my backyard, but I have no way to power the camera other than a battery, so it doesn’t work so well. I’ll upload a video here once I’m done editing it.

Here’s a couple pictures:

Camera and Arduino set up

Arduino and the circuit.

Fixing a DLP rear projection TV.

A few years ago, my uncle had a big screen TV that was starting to go bad. The color wheel was misbehaving, resulting in distorted colors, and sometimes an unstable image. He had an estimate for repairs, and since Sharp doesn’t sell just the color wheel, the whole projection assembly would have to be replaced, from something like $1400. Definitely not worth it, so my uncle got a new TV and gave me the old one. I used it as it was for a short while, but it slowly got worse, and I grew tired of dealing with it.

I decided to take it apart and have a look, to see if I could replace just the color wheel if I could find a source for one (same model TV on Ebay, broken, but with a different issue). I took the back off, pulled out the light engine (the projection assembly) and opened the chamber containing the color wheel. I didn’t feel any problems with the spindle; there was no sticking at all. I saw that there was a thin whitish film on the color wheel, so I took the wheel out and cleaned it with Windex (probably not the best idea, but it hasn’t been a problem so far). I then noticed that the outside of the motor had the same film on it. The outside of the motor case what shiny reflective silver, and it had a black sticker on it, and there is an optical sensor to make sure the wheel is spinning at the correct speed (10800 rpm I think). I figured that the film came from the chamber getting too hot, and when it got hot after a couple of hours of use, the optical sensor would misread the speed and the TV would try to compensate, resulting in all the problems I was having. I cleaned off the motor housing with Windex and put it back together, and it worked.

I still wanted to get a spare color wheel, just in case, so I contacted a seller on Ebay who agreed to send me just the color wheel. I had offered to make him a guide to take it out of the TV, and he said he would want that. So I took the TV apart again, but this time I took lots of pictures. Once I had it apart, I thought why not make a guide on how to fix the TV like I fixed mine, so others with the same problem can fix it themselves. I documented the whole process, and wrote it up on Instructables. Before this guide, I couldn’t find any info on repairing this TV, only others with the same problem. I’ve gotten comments from a few people saying they were able to fix their TV with my guide. The Instructable is here: http://www.instructables.com/id/How-to-fix-your-Sharp-56DR650-with-color-wheel-iss/